
Step 1: Where they are
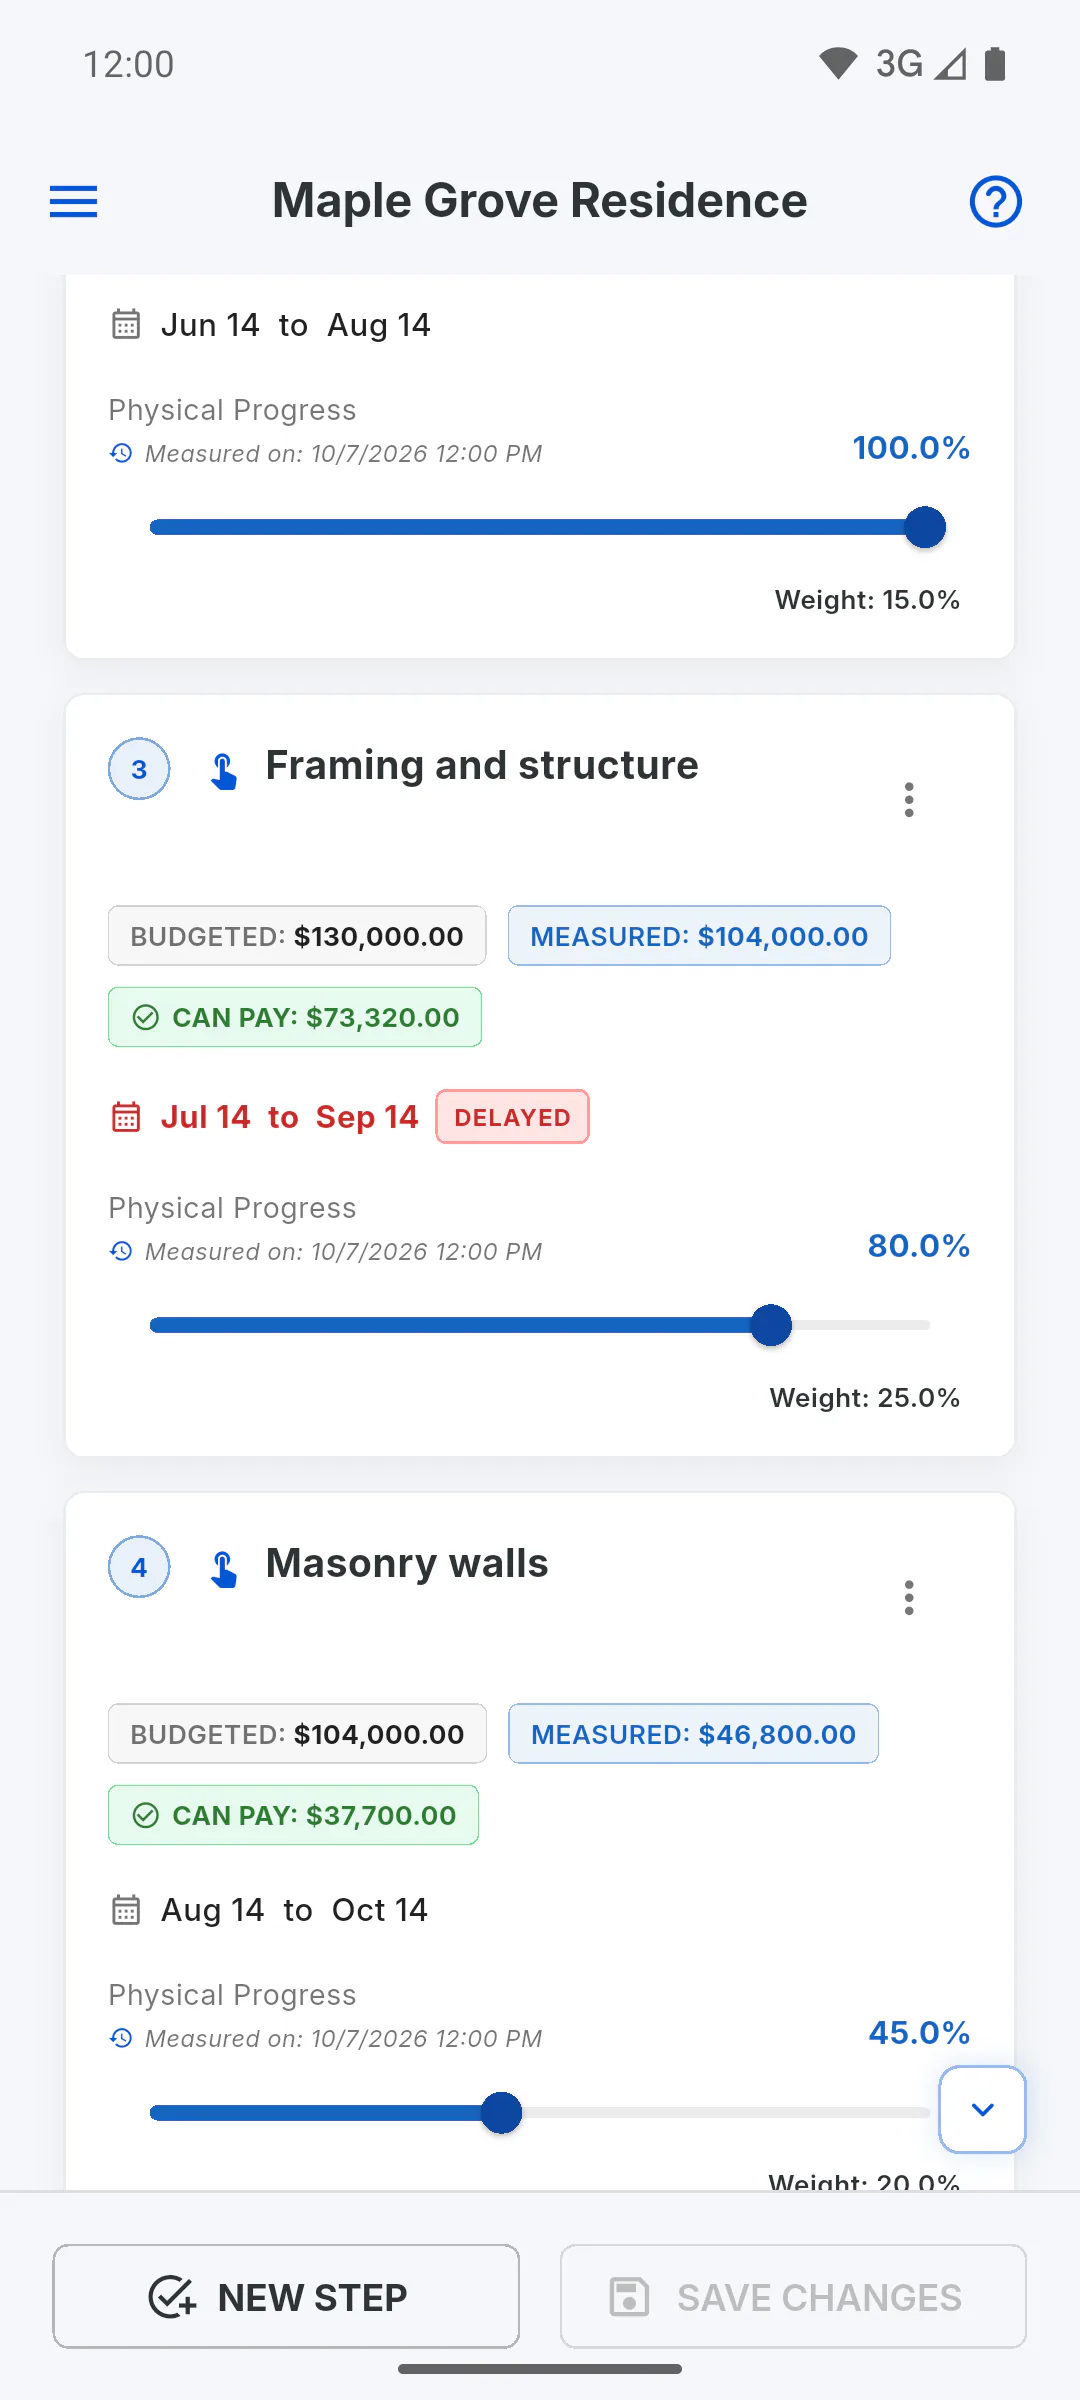
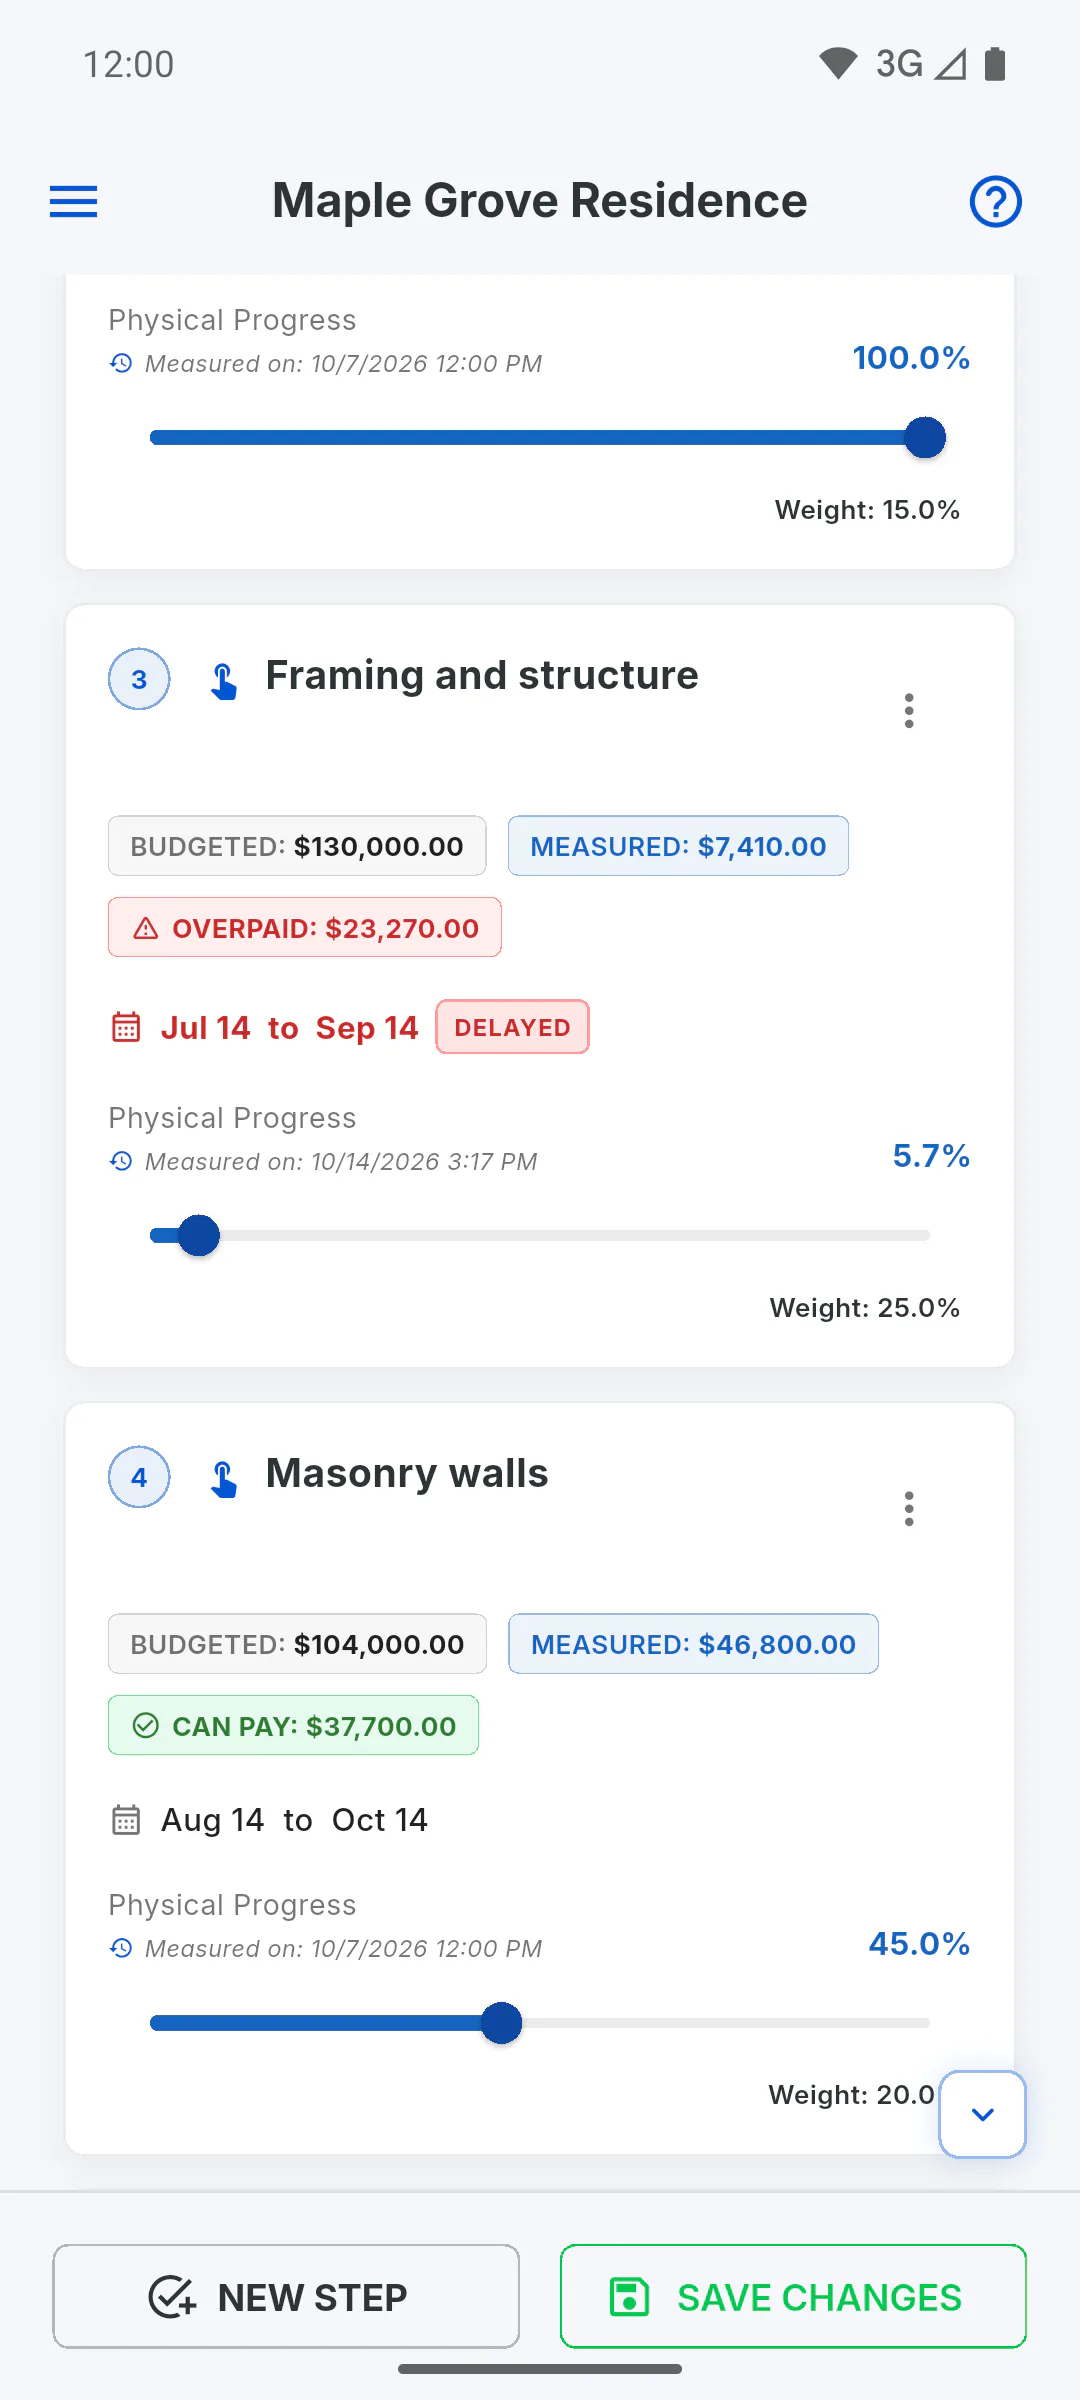
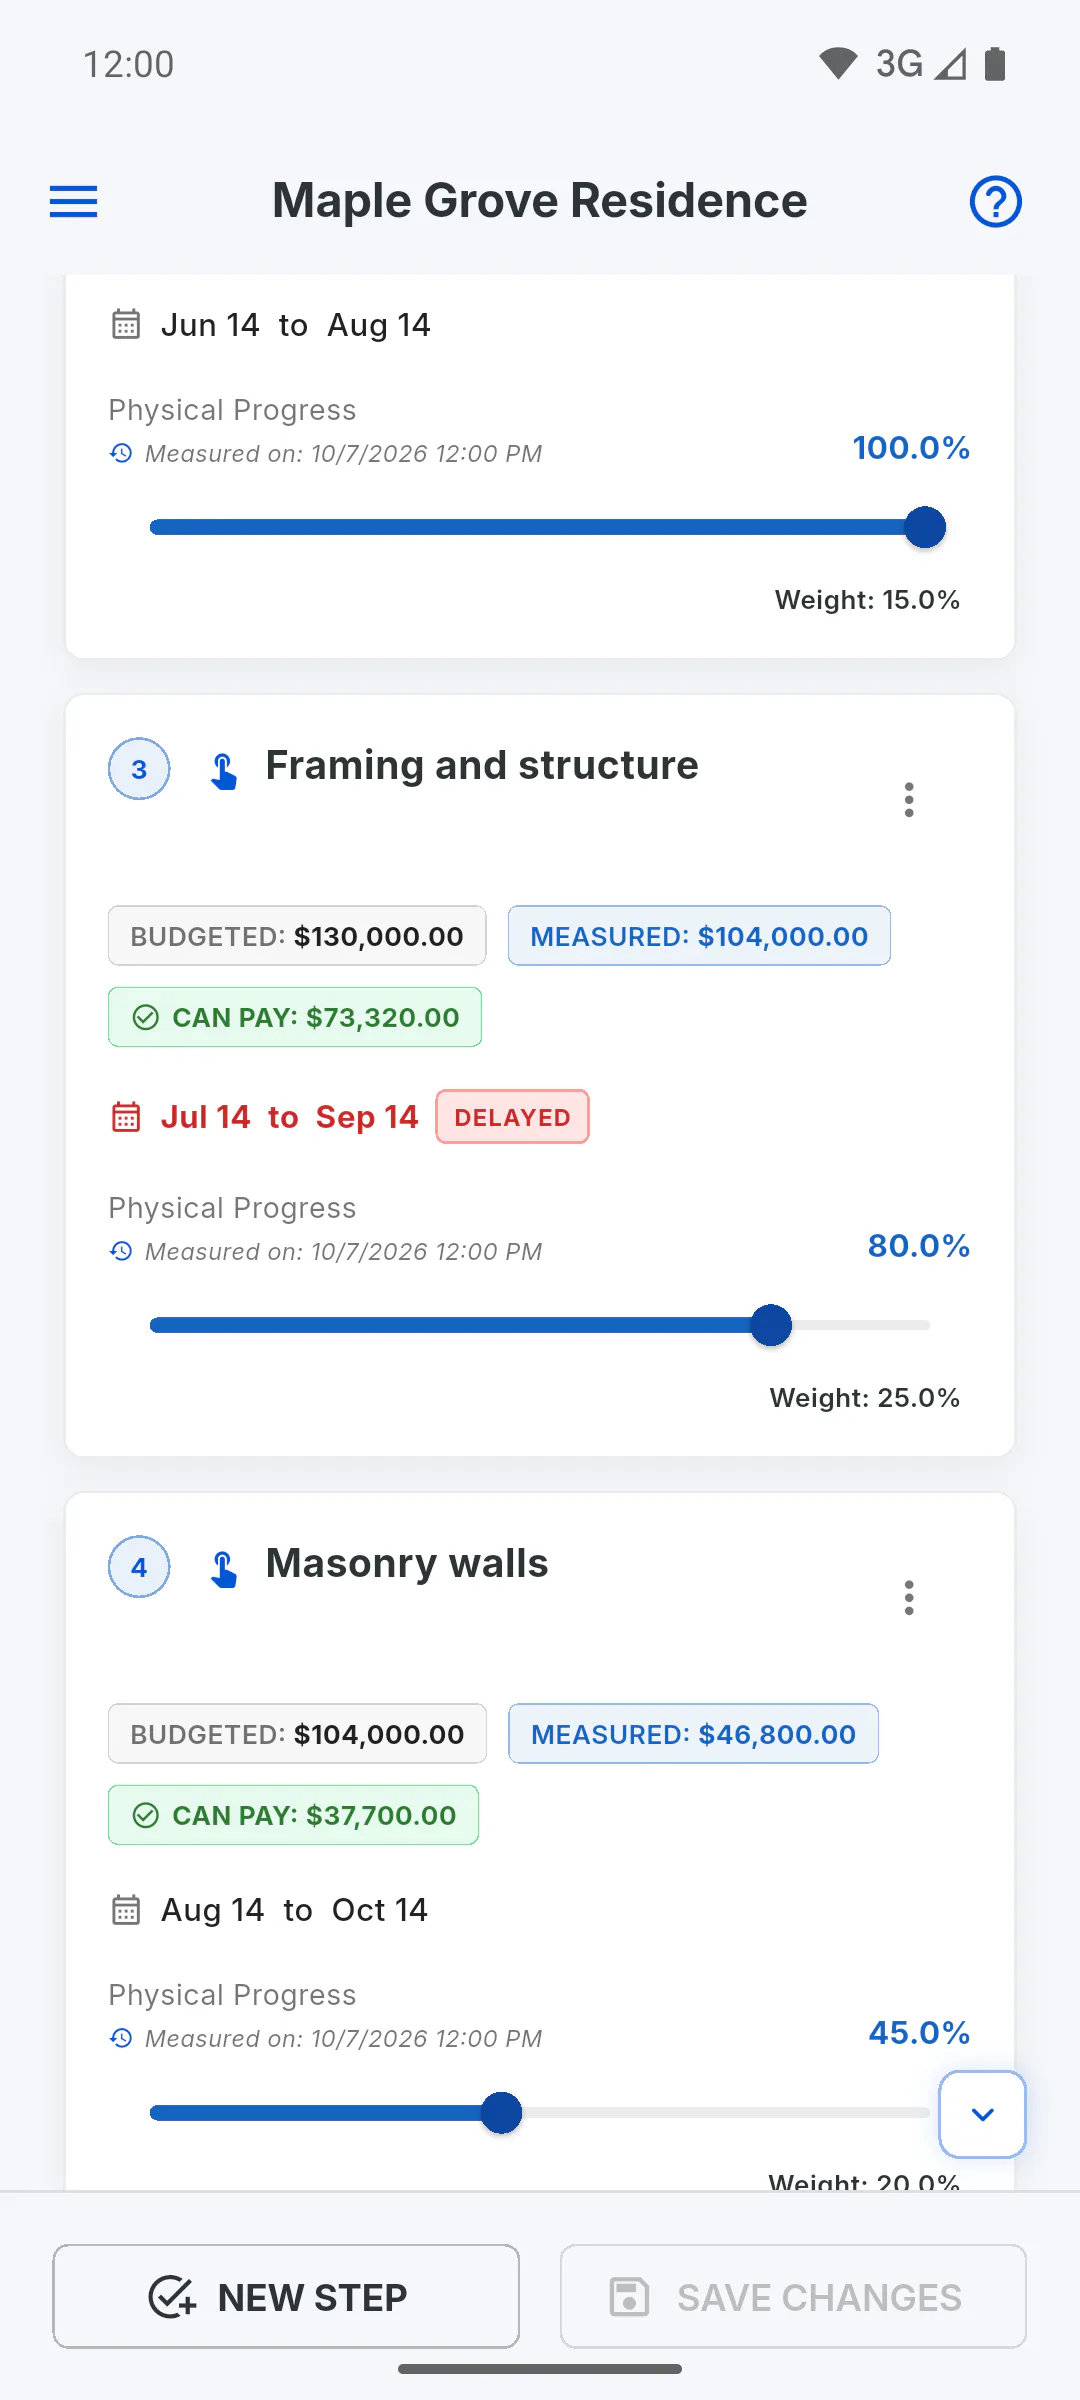
On Schedule, each stage card shows three value labels under the name: Budgeted, Measured, and either Can Pay or Overpaid. When the stage has dates, the period appears just below, with the start date, to and the end date. Amounts are in the project's currency.
Step 2: BUDGETED and MEASURED
- Budgeted: the stage's Planned Value
- Measured: the budgeted amount times physical progress. A 10,000 stage at 40% progress has 4,000 measured. It changes as soon as you move the stage's slider.
Step 3: Where the paid amount comes from
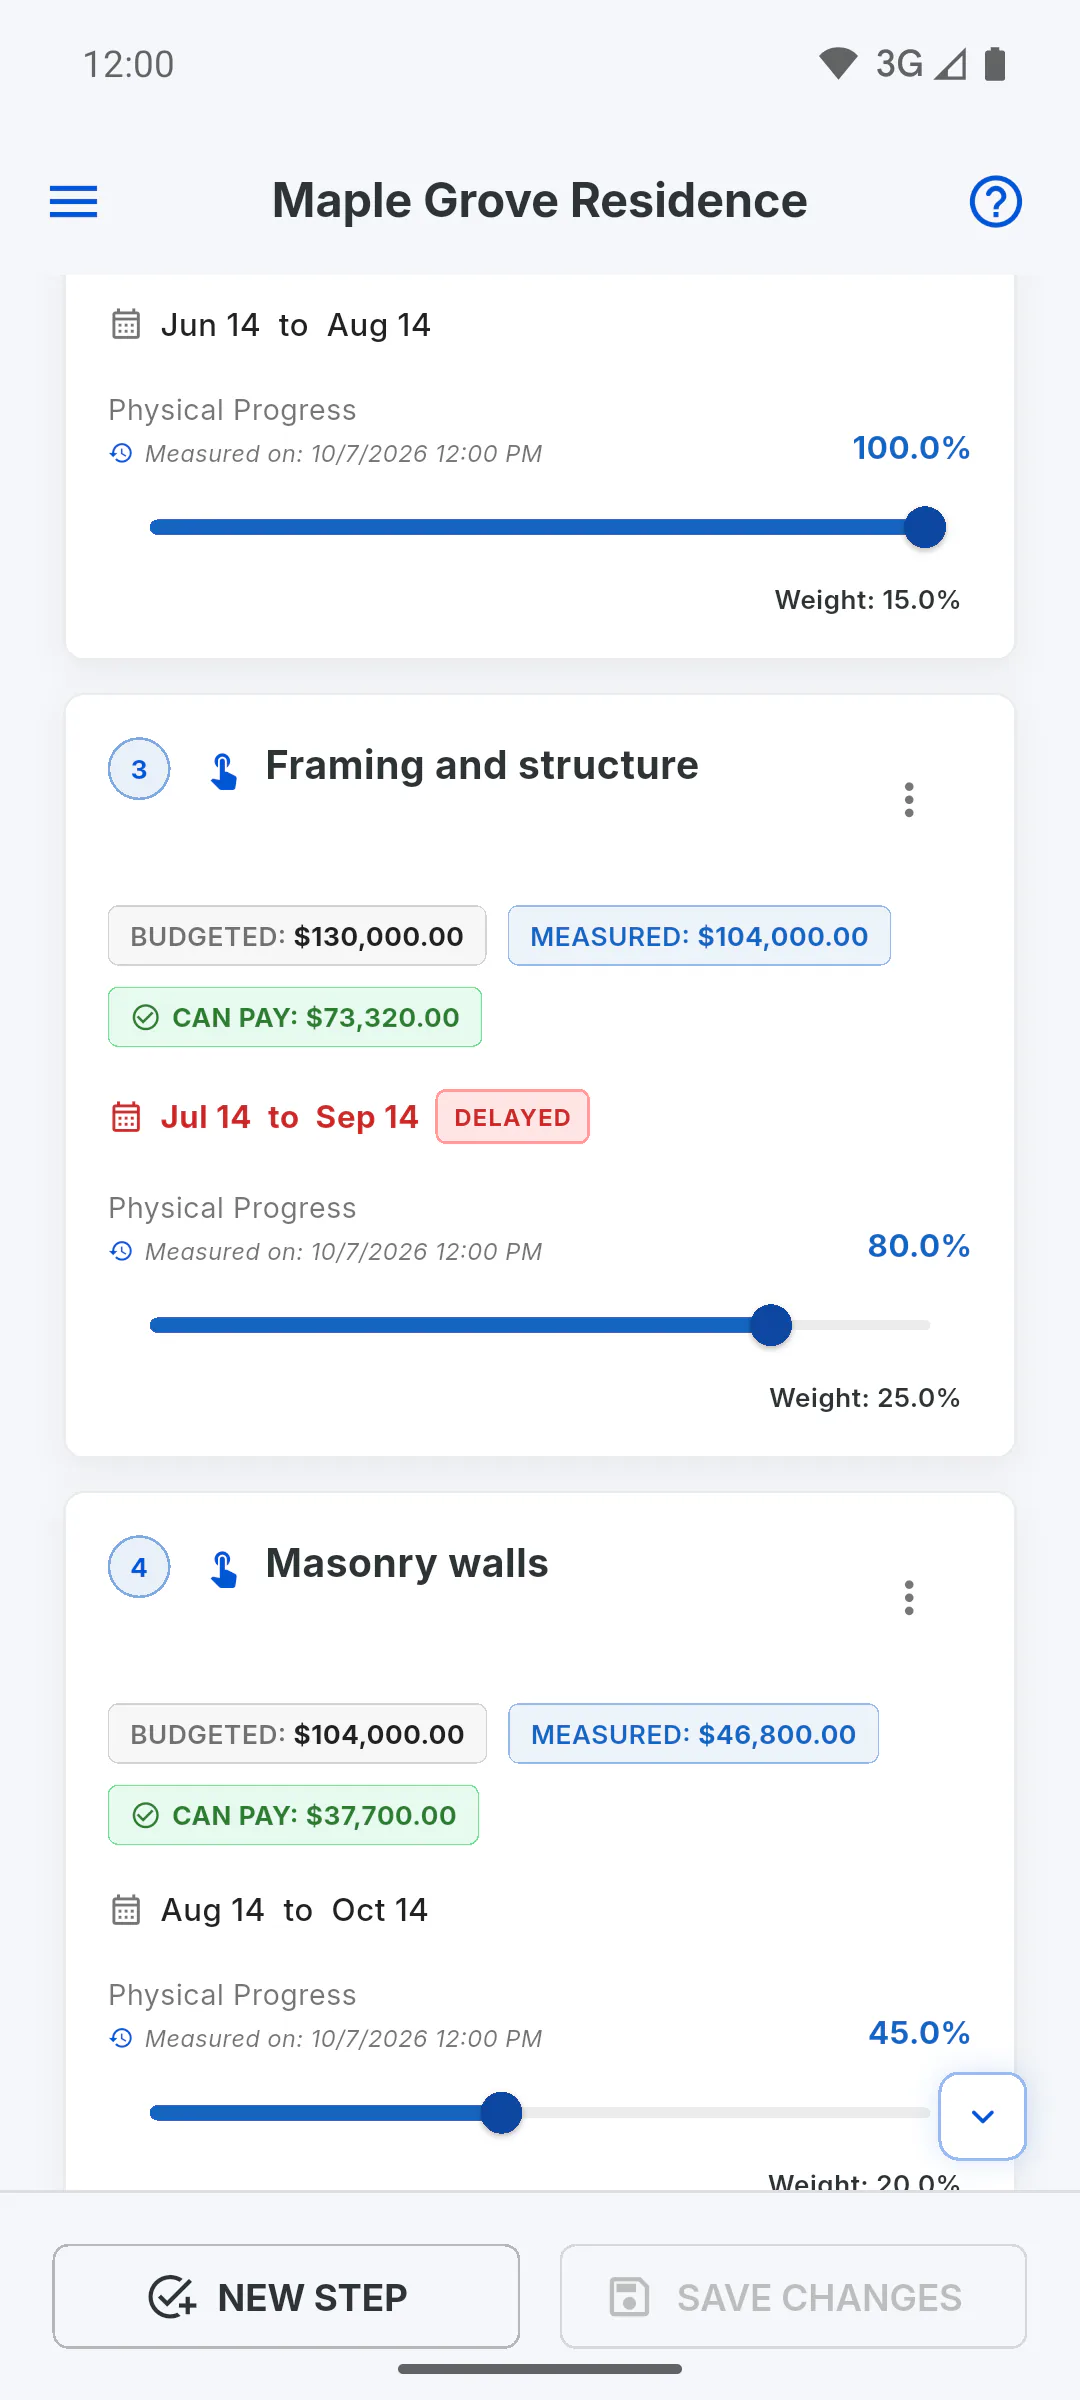
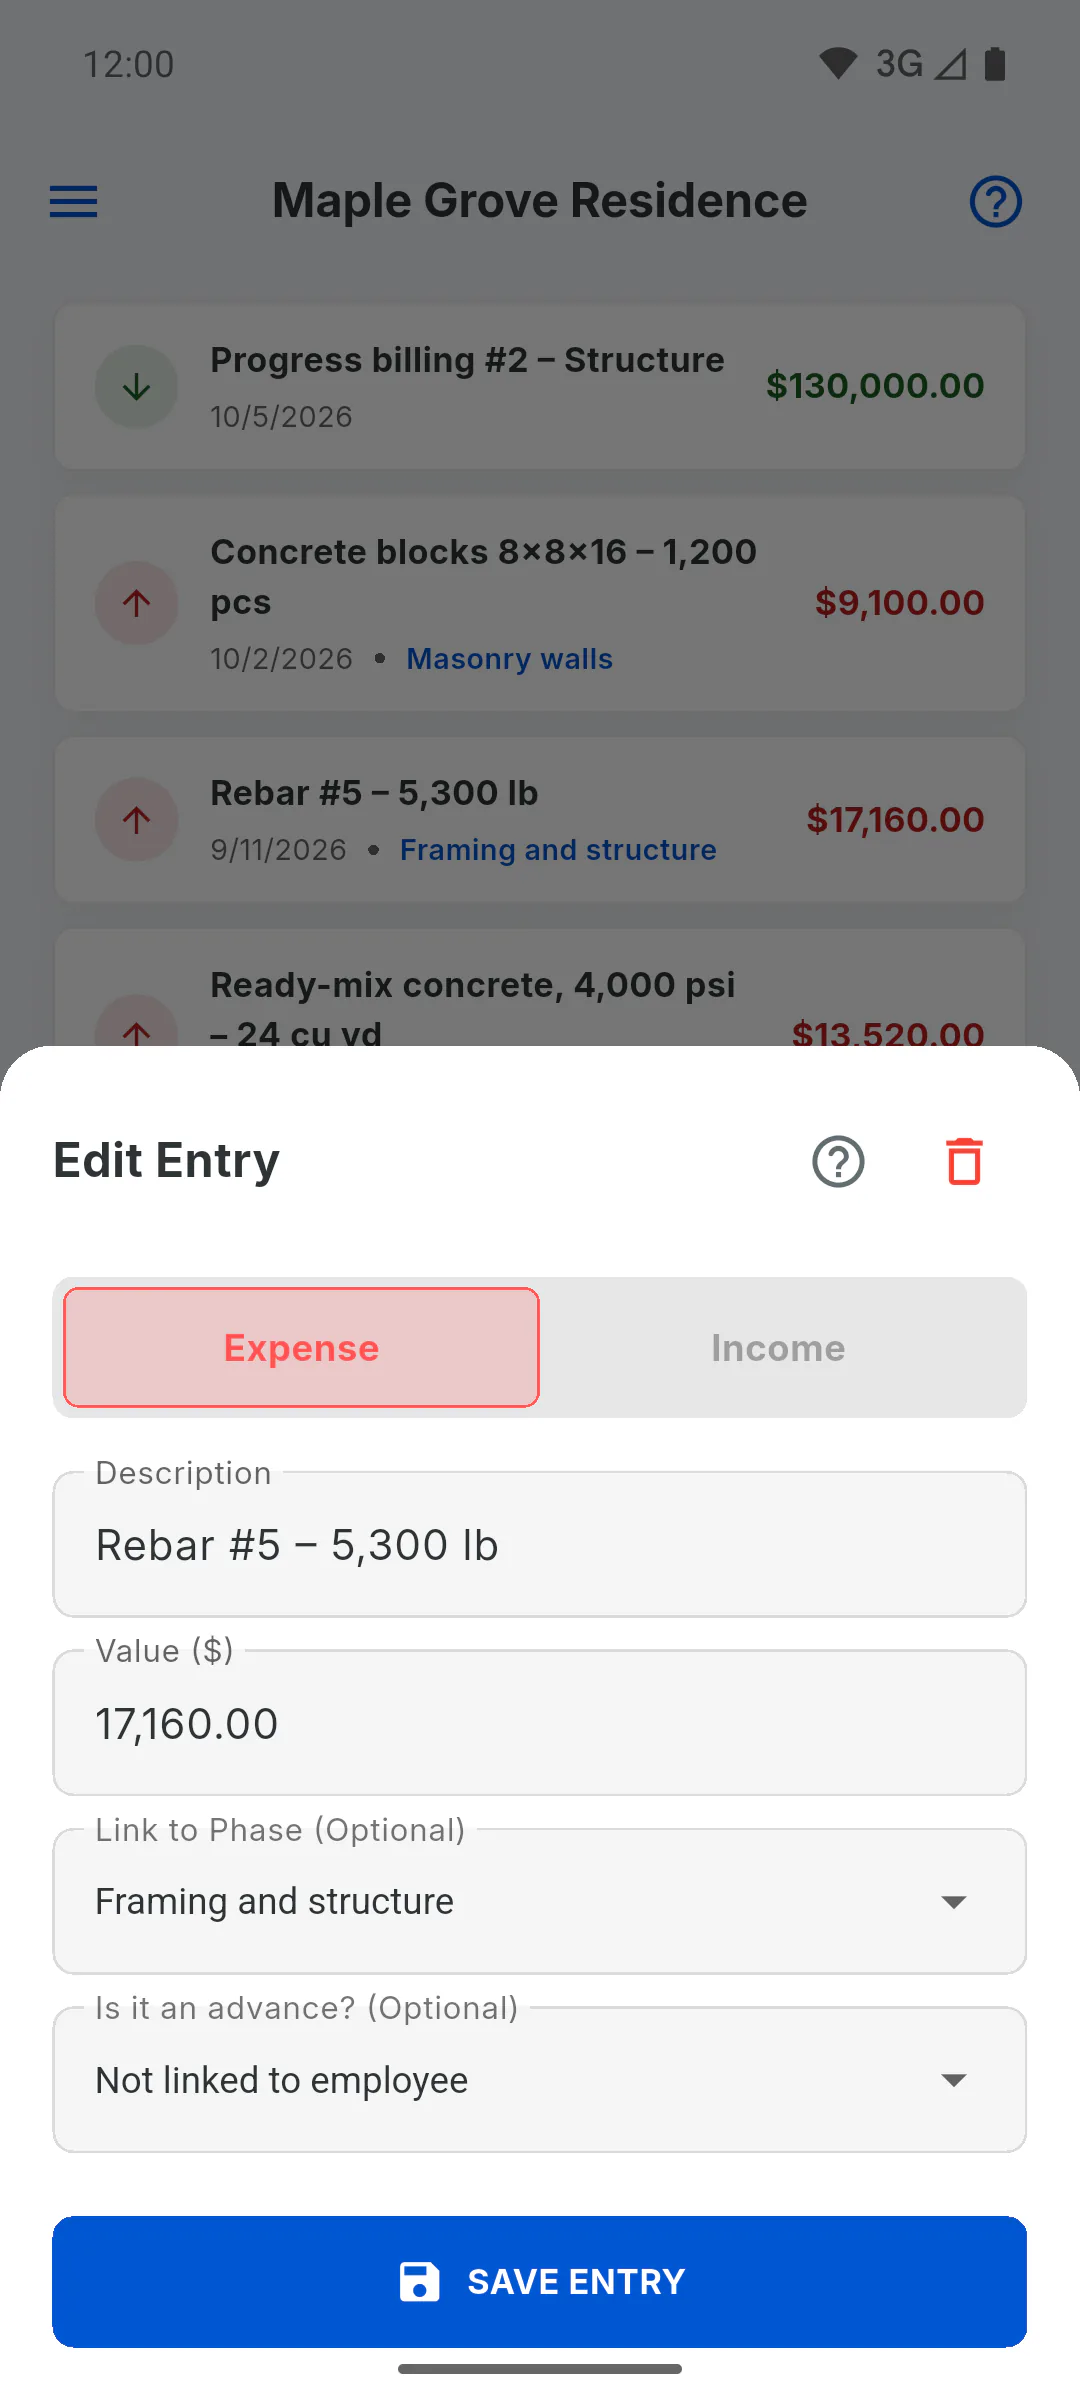
Each stage's paid amount is the total of the expenses entered in Financial with that stage chosen under Link to Phase (Optional). Income isn't counted. The link is made by the stage name: Why link expenses to stages
Step 4: CAN PAY
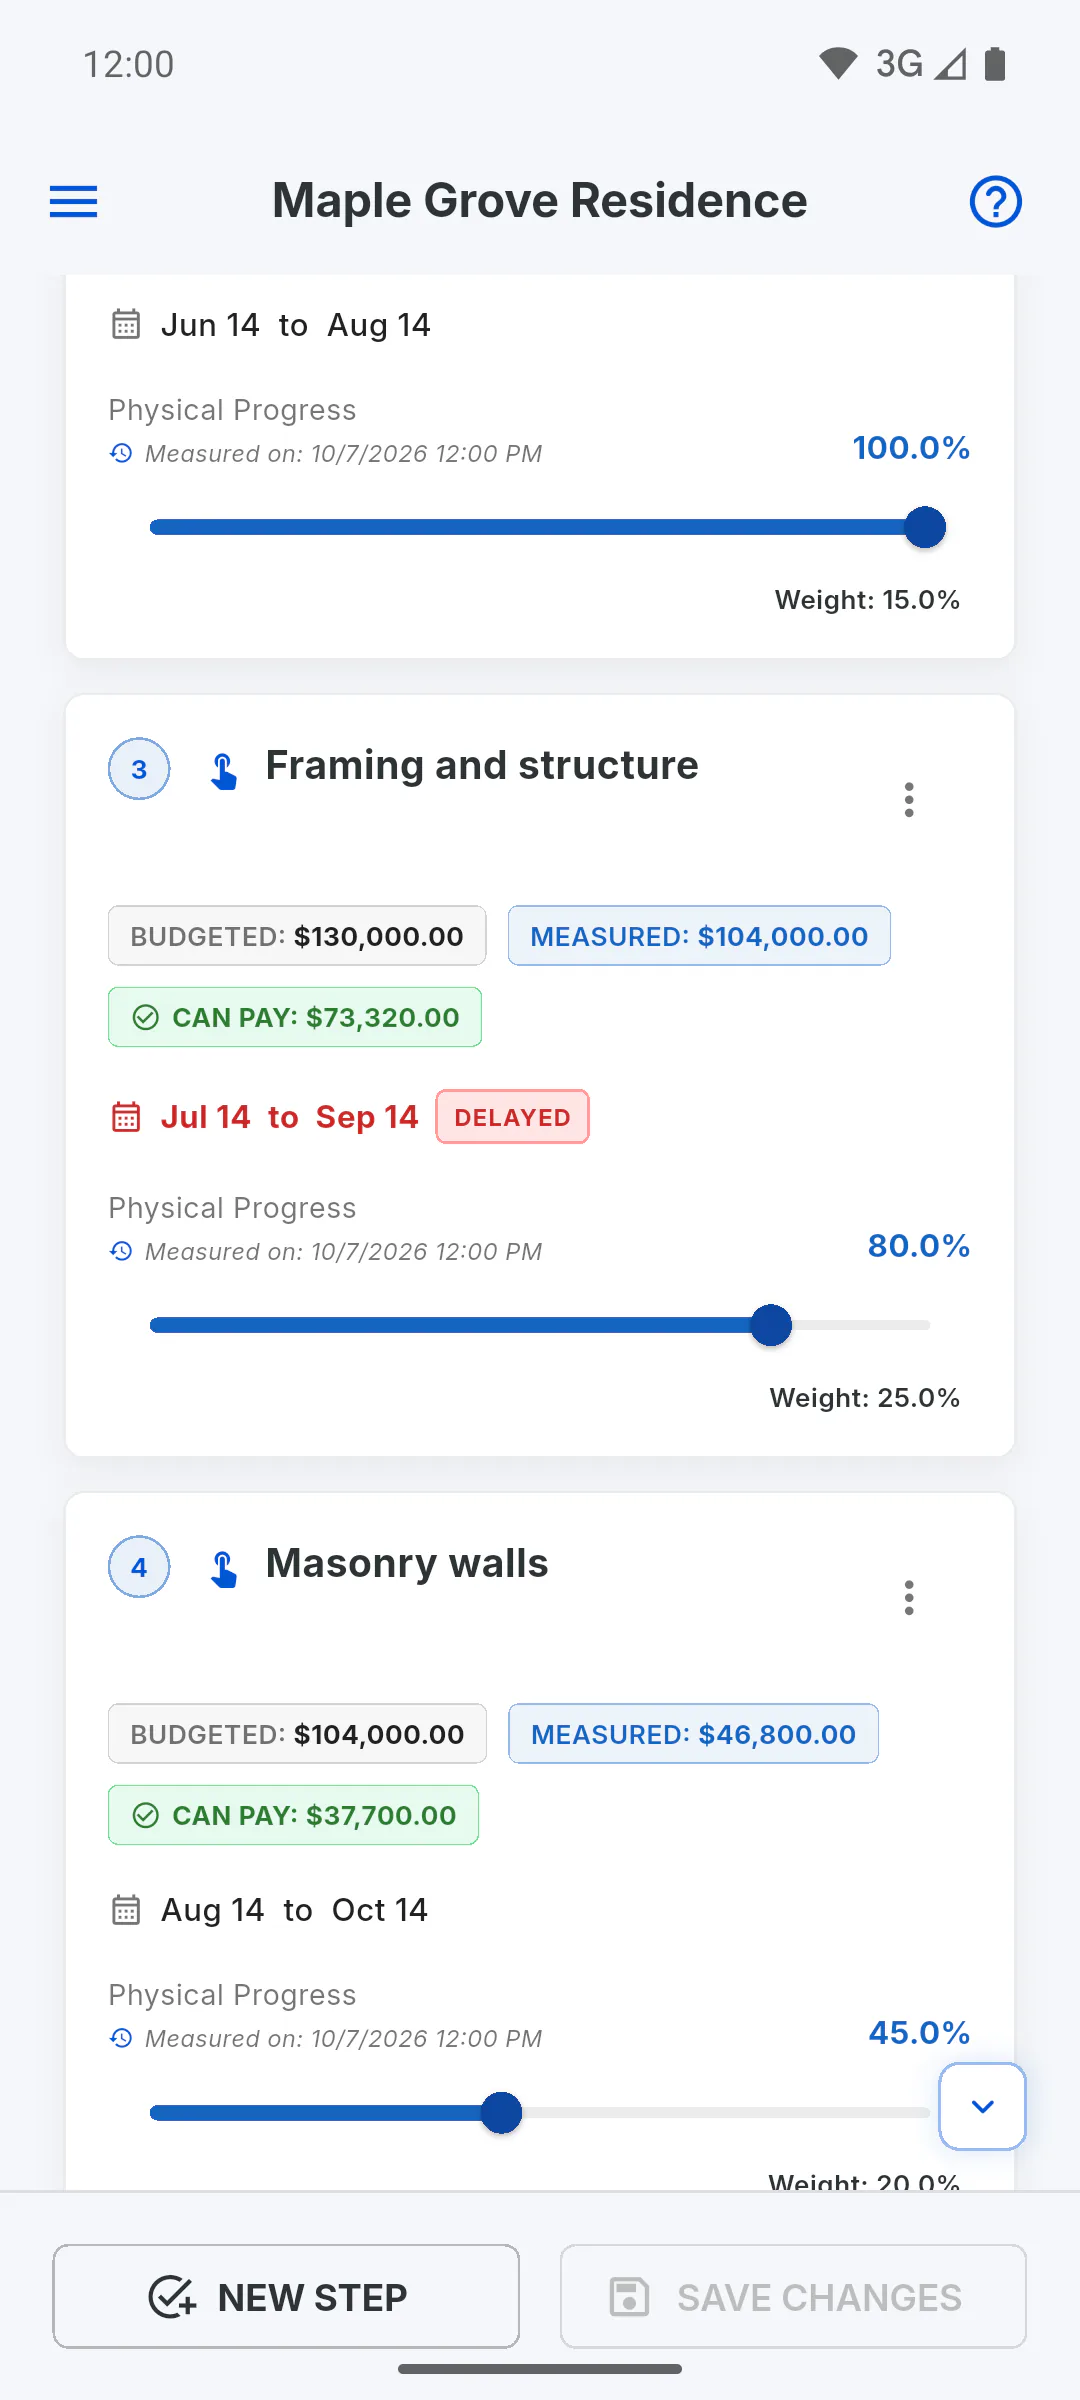
Green label: the measured amount minus what's already been paid, in other words how much of the work done hasn't been paid yet. If it shows zero, everything measured has been paid.
Step 5: OVERPAID
Red label that replaces Can Pay when the paid amount goes over the measured amount. It shows the difference: how much has been paid beyond the work done on the stage.
Step 6: DELAYED
Appears next to the period when the Expected End has passed and the stage hasn't reached 100%; the dates turn red. It also applies to each sub-stage with dates. A stage with no Expected End is never delayed: How to edit a stage
What Budgeted, Measured, Can Pay, Overpaid and Delayed mean
Understand the value and deadline labels on each stage card: how much was budgeted, measured and paid, and when a stage fell behind.
For managers6 steps
Didn't find what you were looking for?
Chat with support on WhatsApp or open a ticket right in the app.