
Step 1: Open New Project
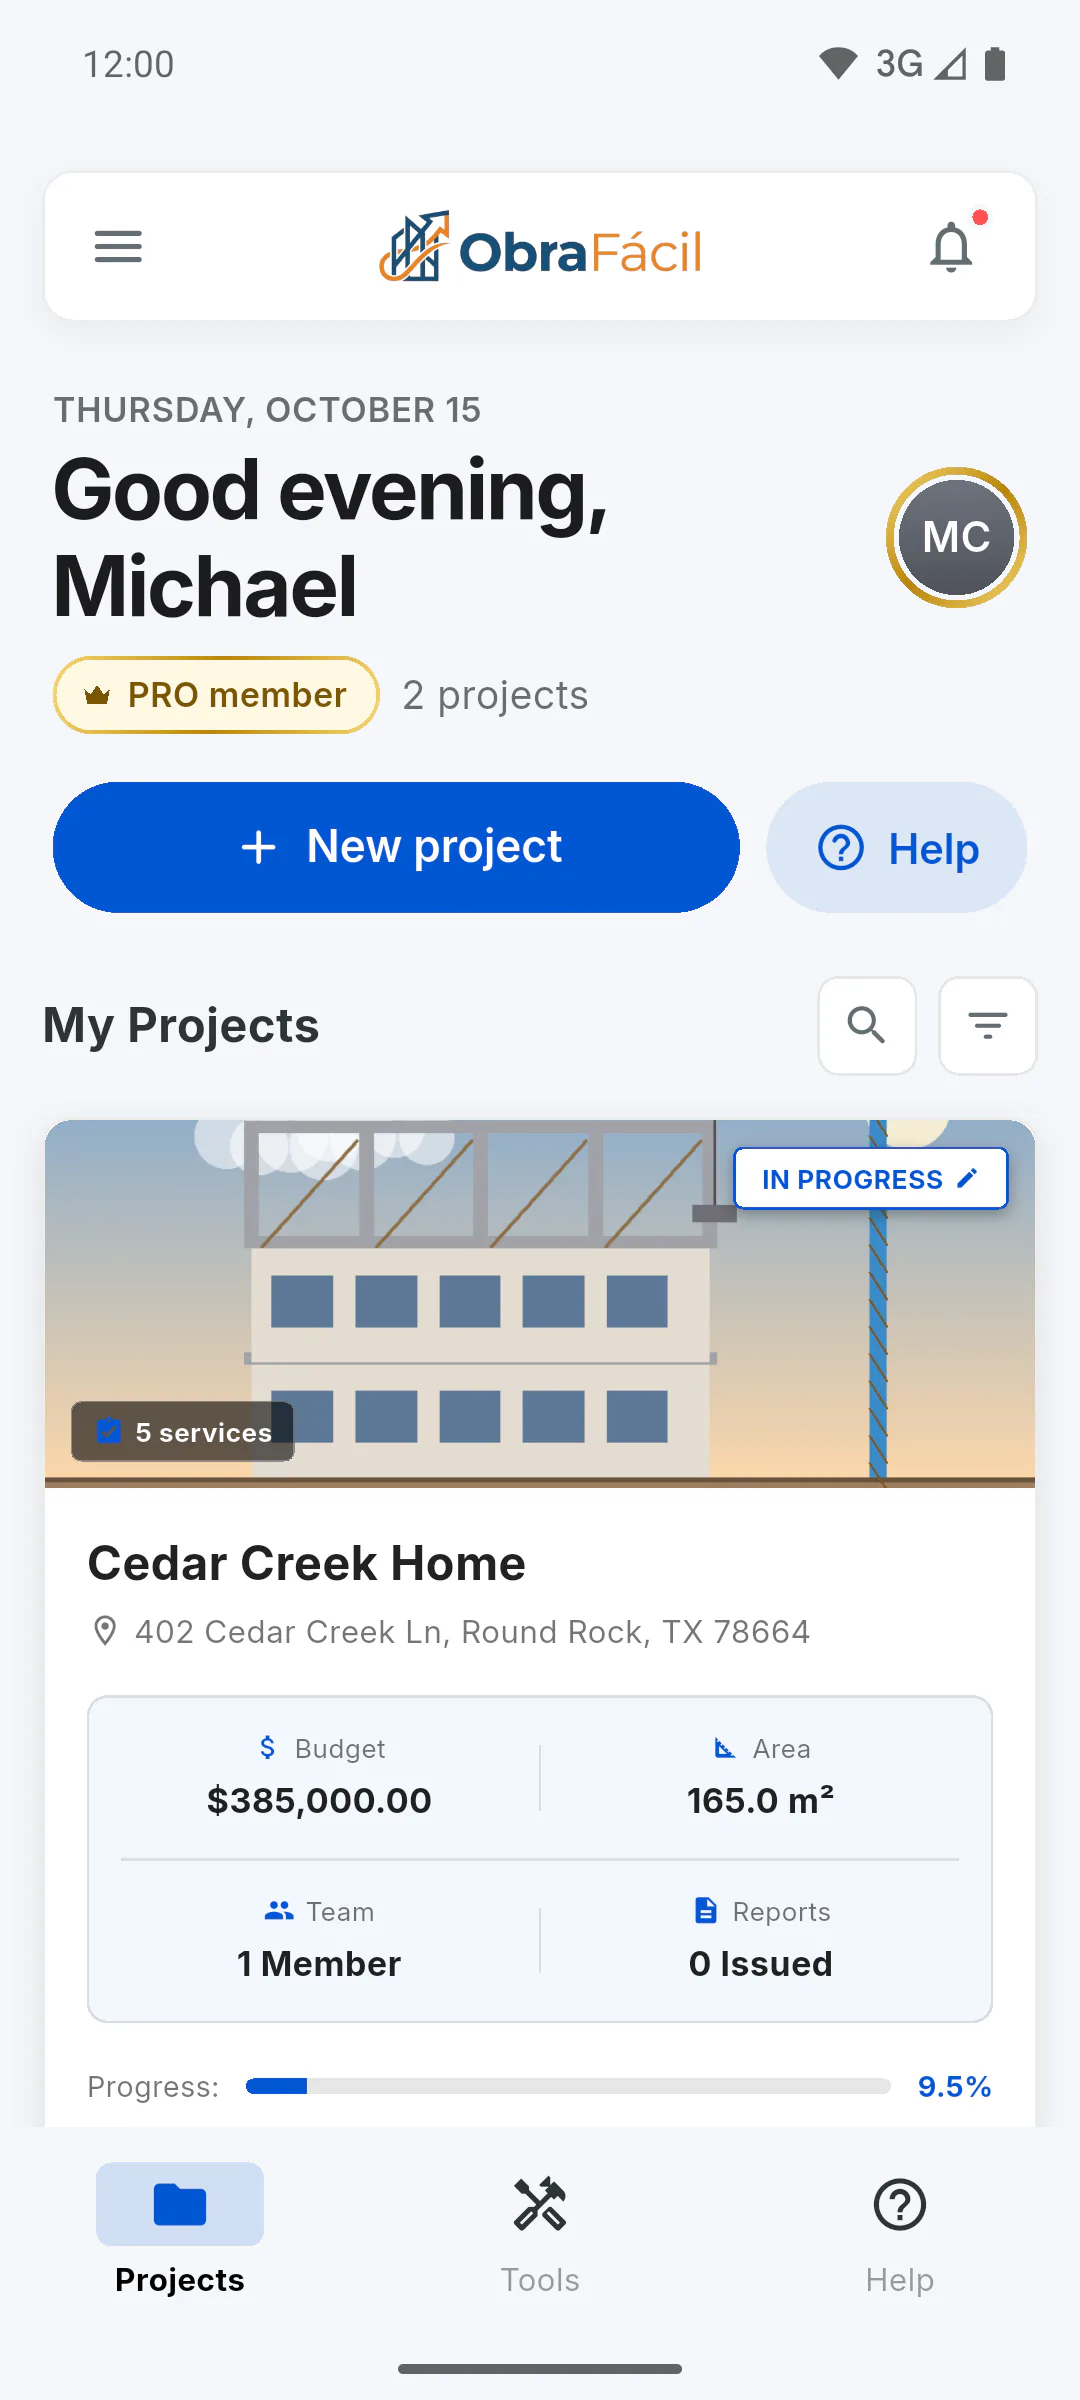
On the dashboard, tap New project, below the greeting. The New Project screen opens; fill it in from top to bottom.
- On the free plan, if you already have a project, you'll see Project Limit Reached: How many projects can I have on the free plan
Step 2: Project cover (optional)
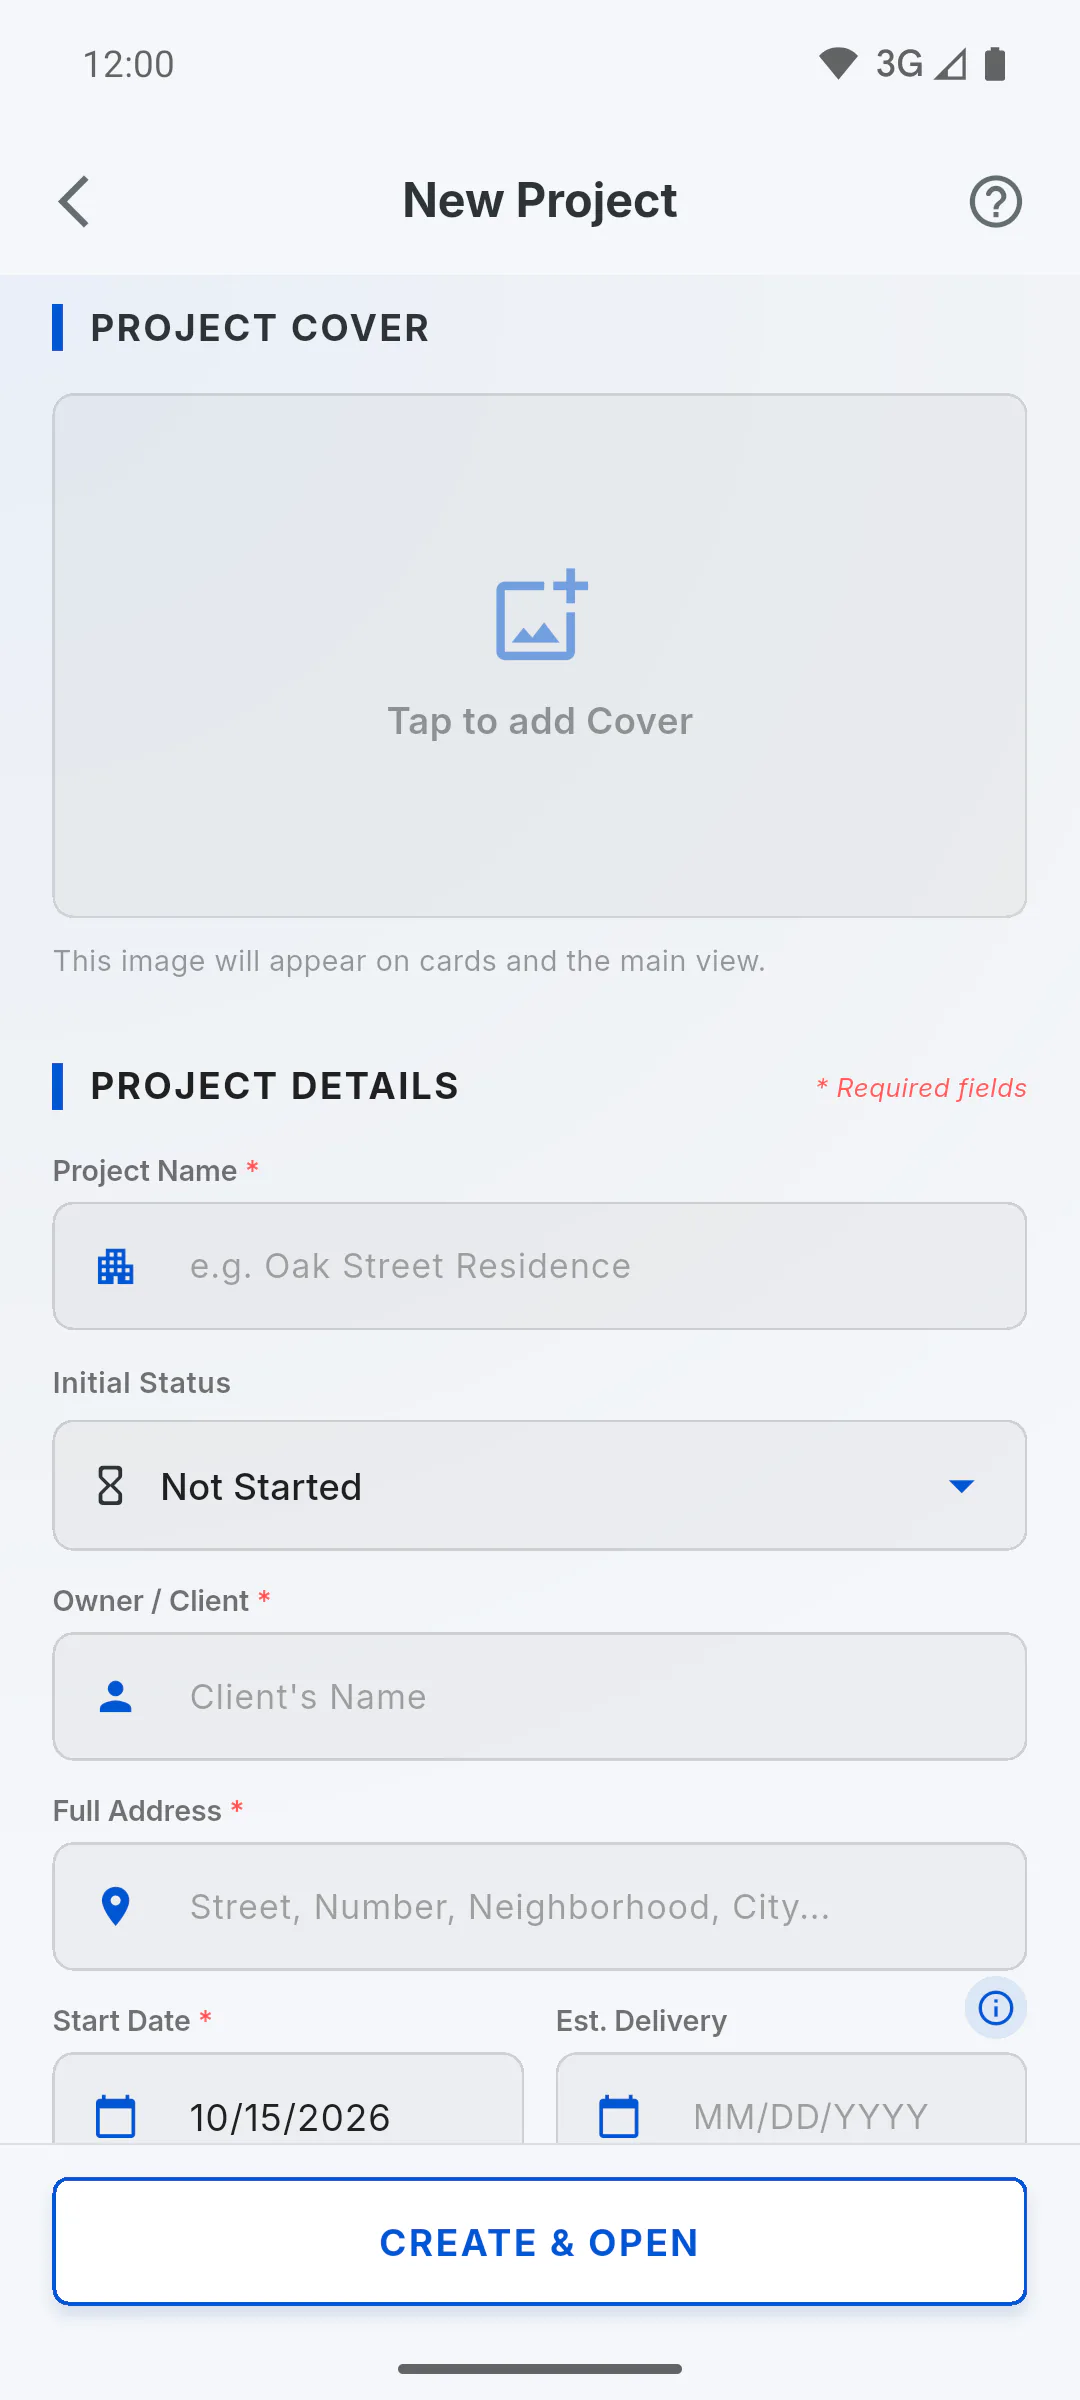
Under Project Cover, tap Tap to add Cover and pick an image from your gallery. It shows on the project card and at the top of the project screen: How to add or change the cover photo
Step 3: Project details
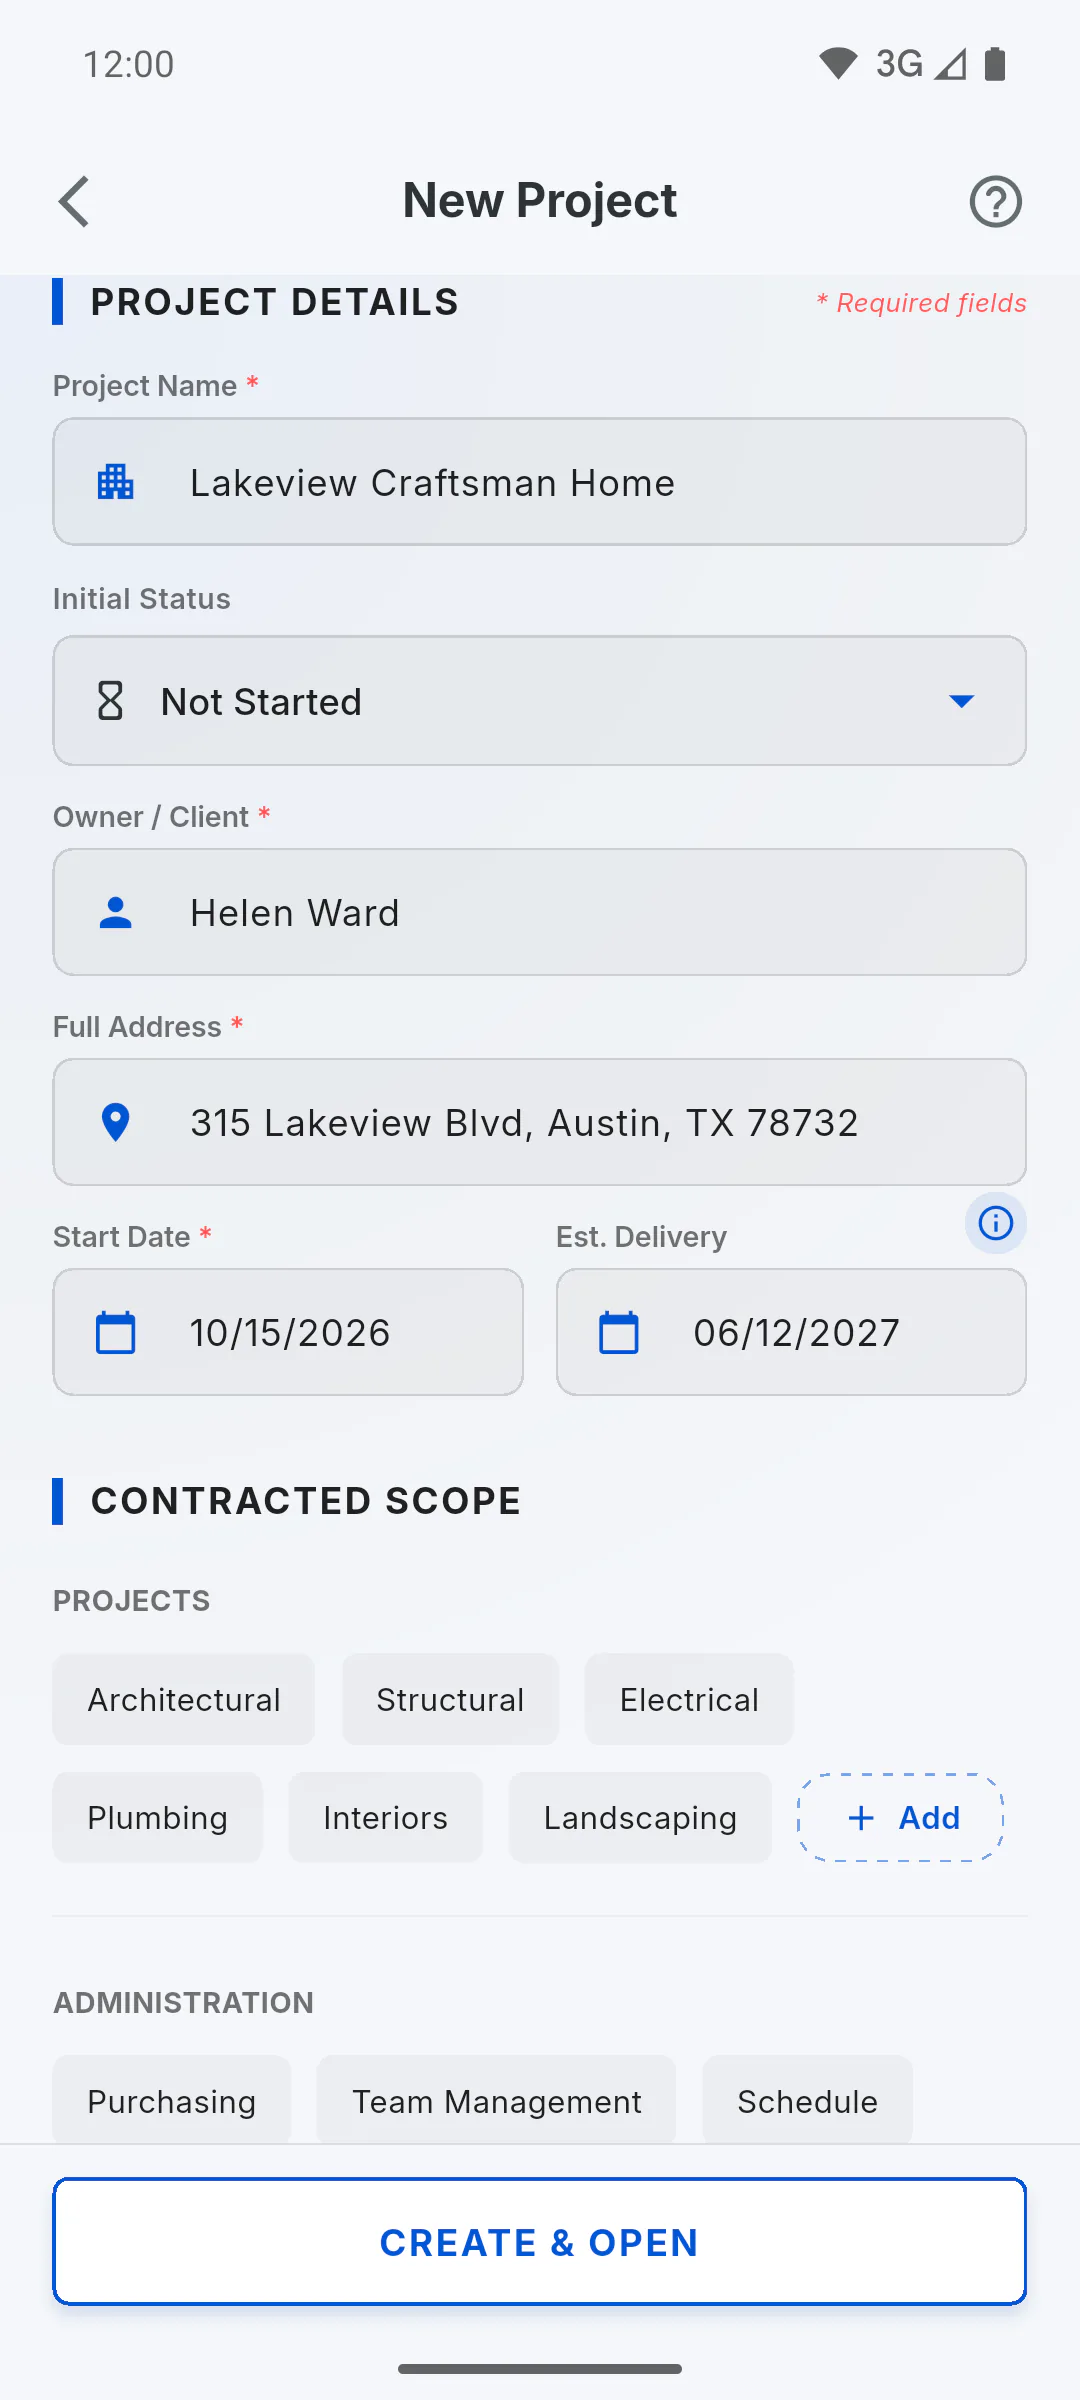
Under Project Details, fill in Project Name and Owner / Client. Start Date is already set to today. Choose the Initial Status and enter the Full Address and Est. Delivery, which the schedule uses to track the deadline.
- For dates, tap the Pick a Date icon, the calendar at the start of the field. The date shows as month/day/year.
- Only Project Name, Owner / Client and Start Date stop you from saving if left empty.
Step 4: Contracted scope
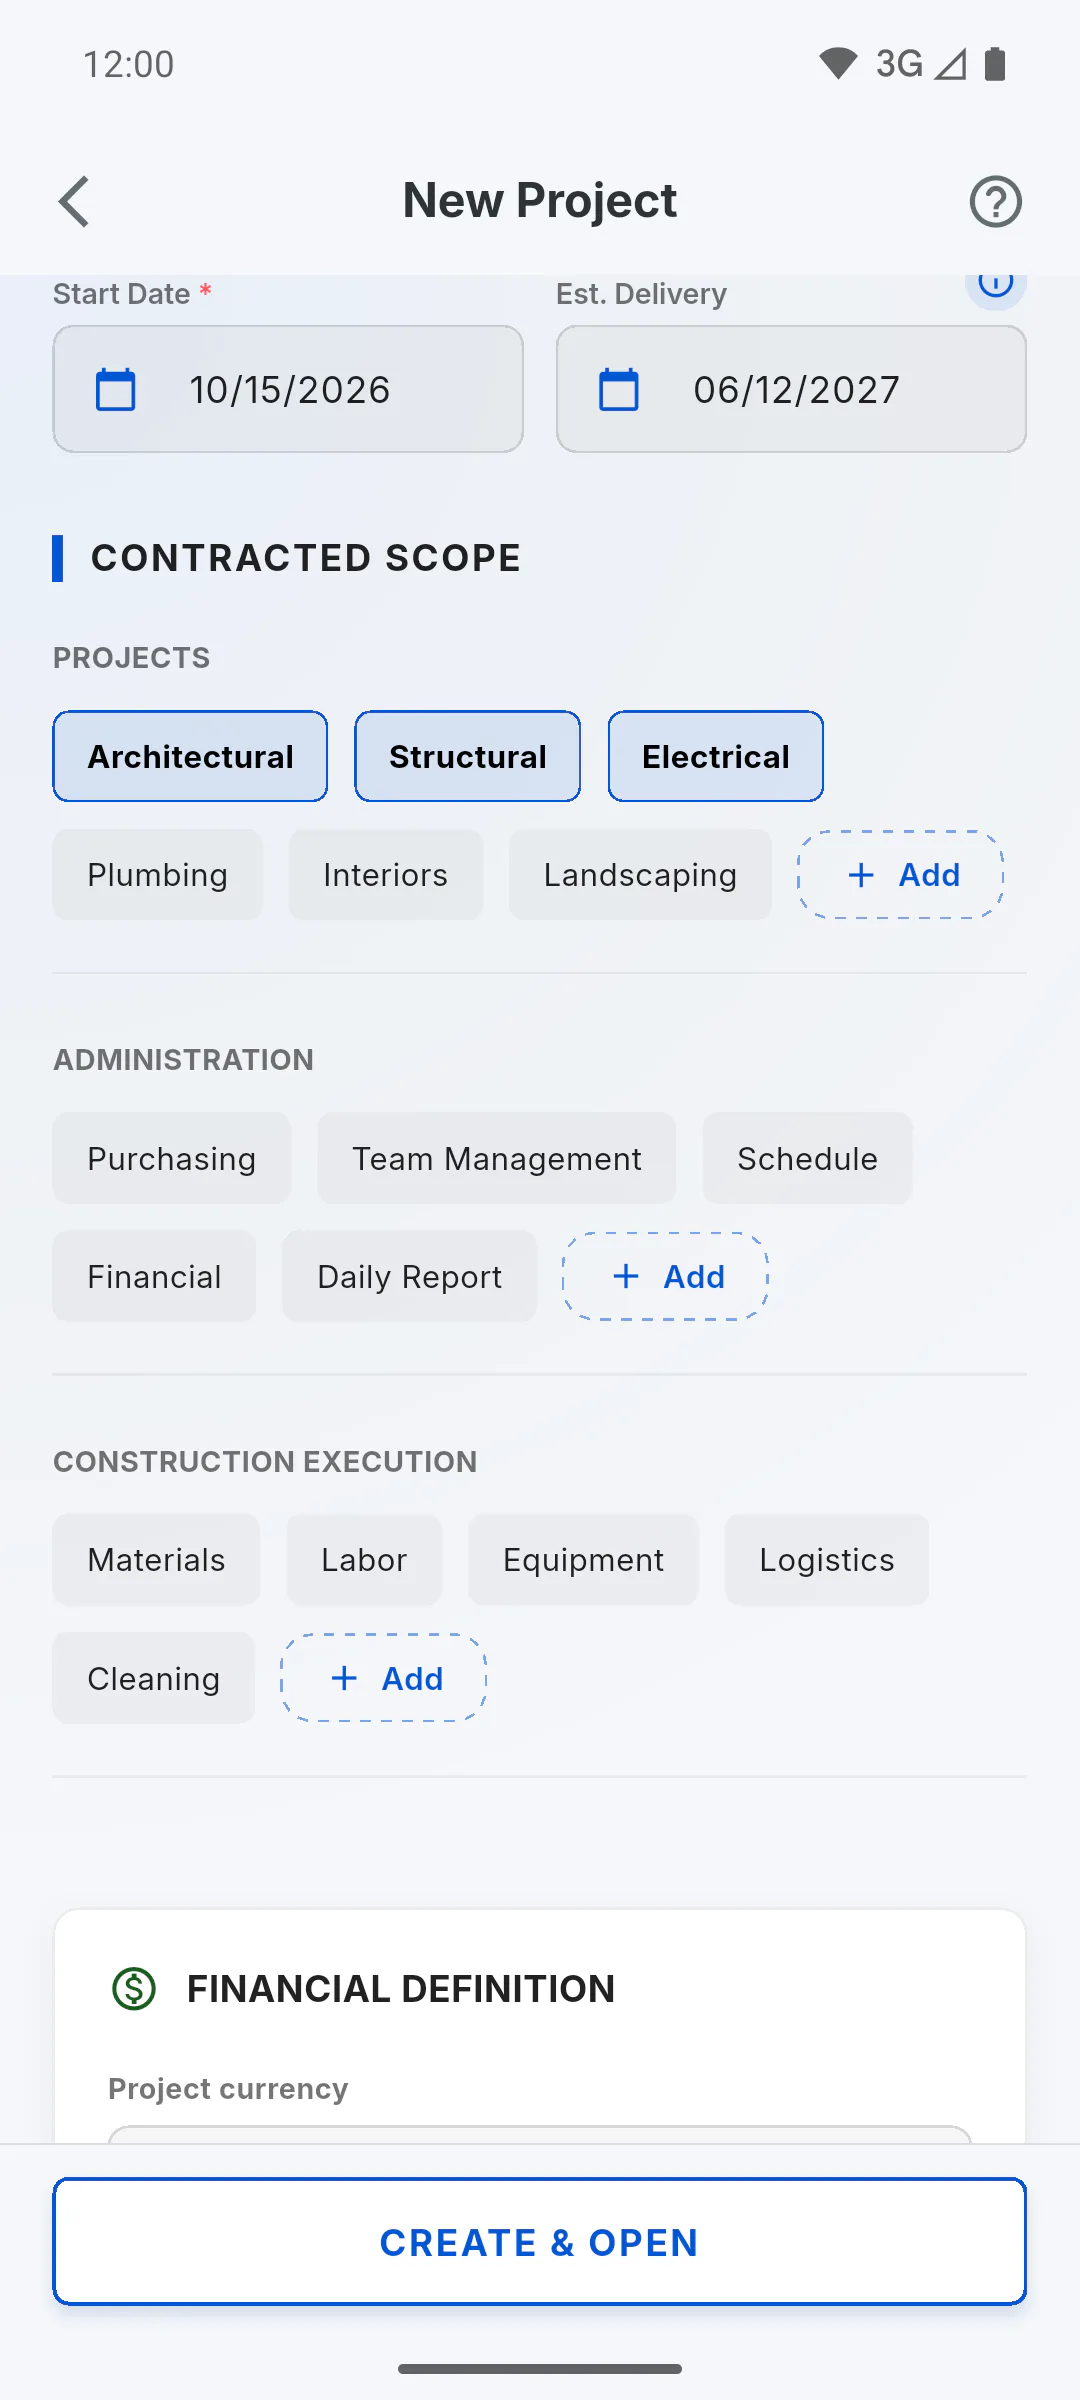
Under Contracted Scope, tap the services included in the contract. Tap again to deselect: How to set the contracted scope
Step 5: Currency, value and area
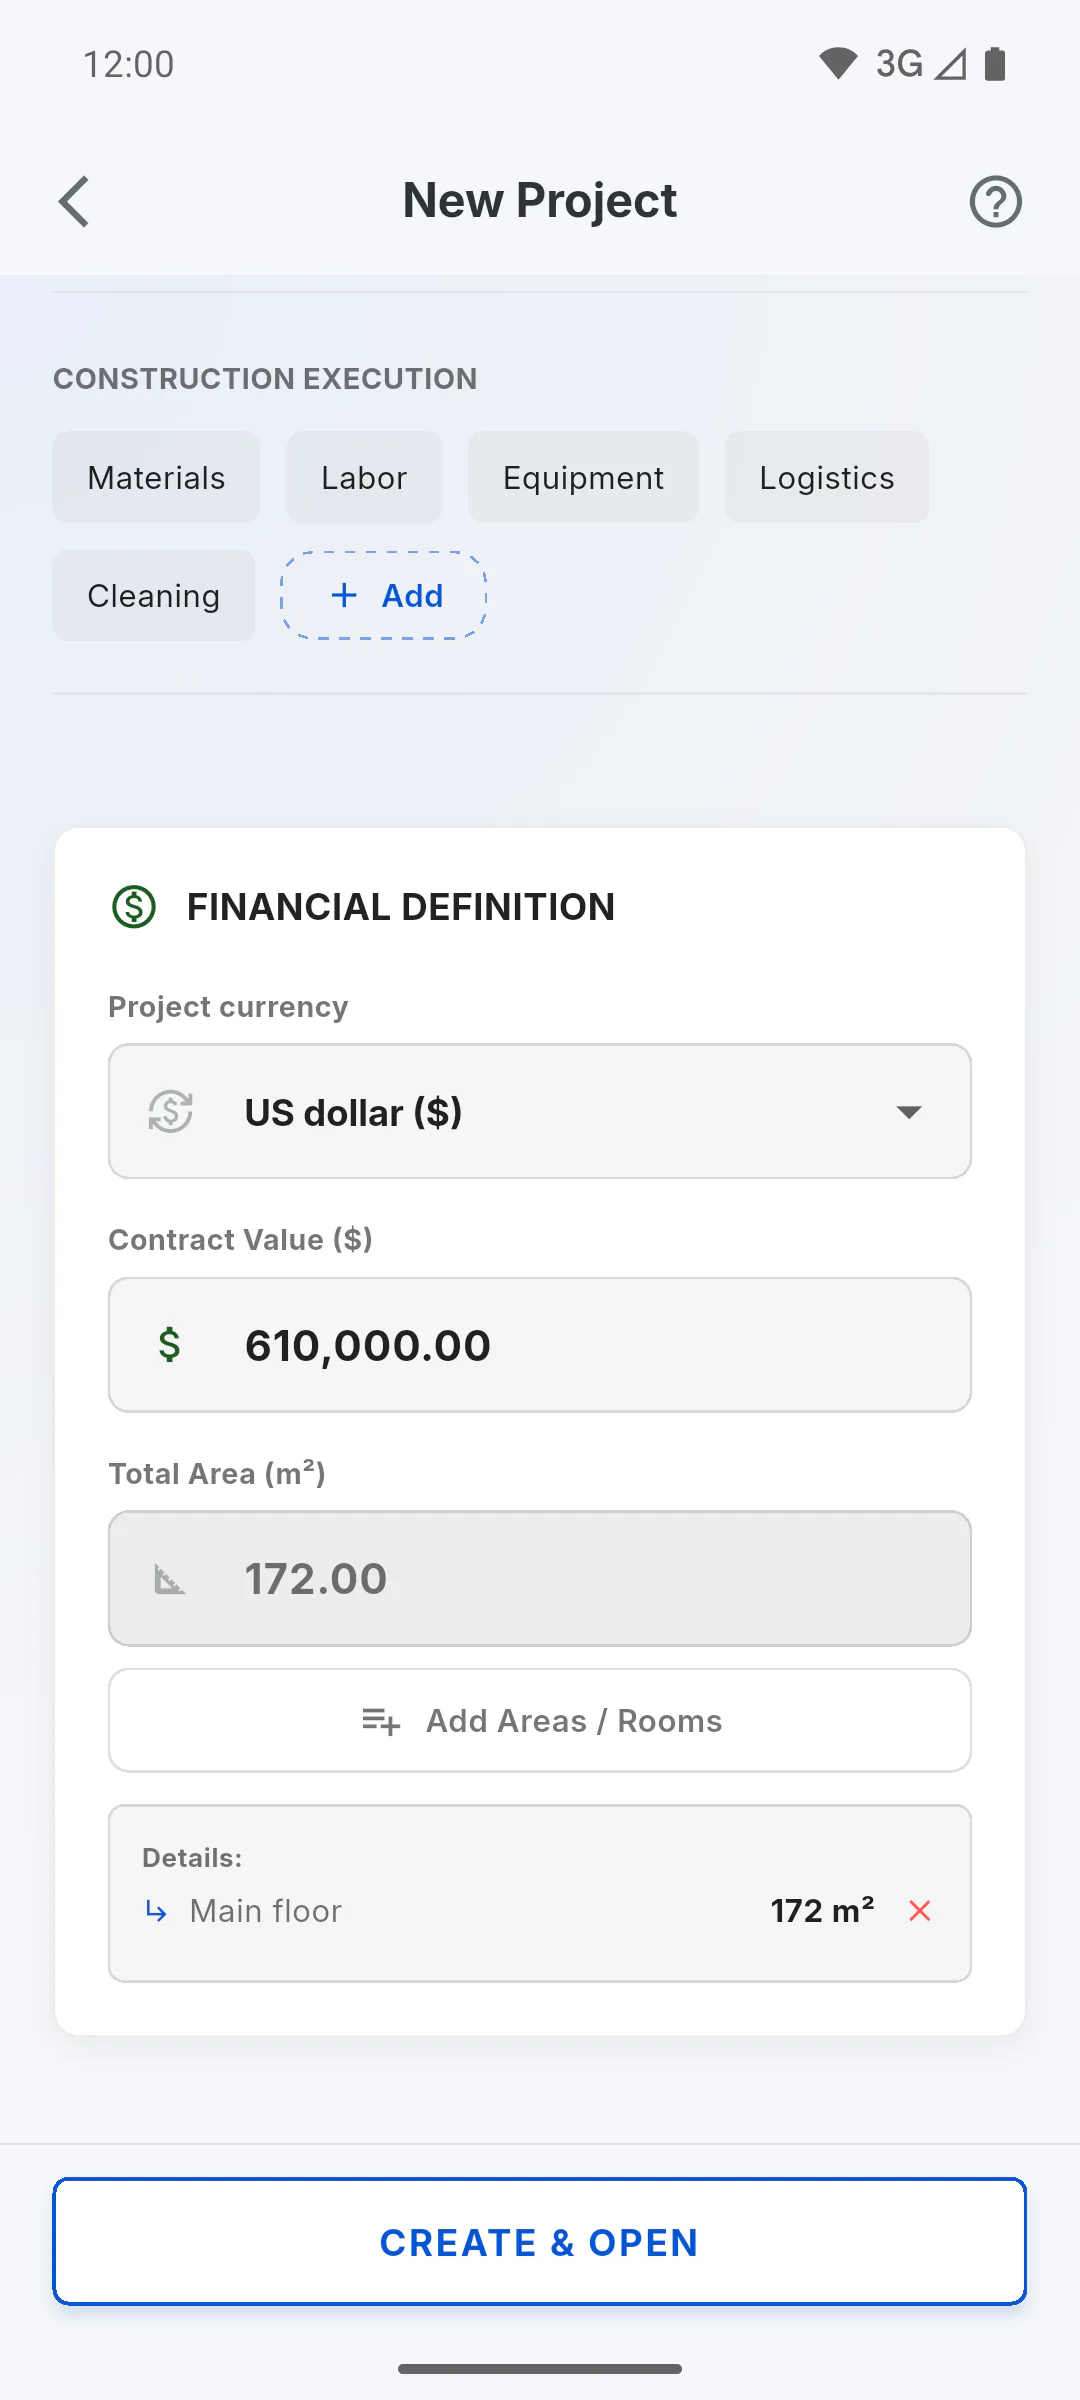
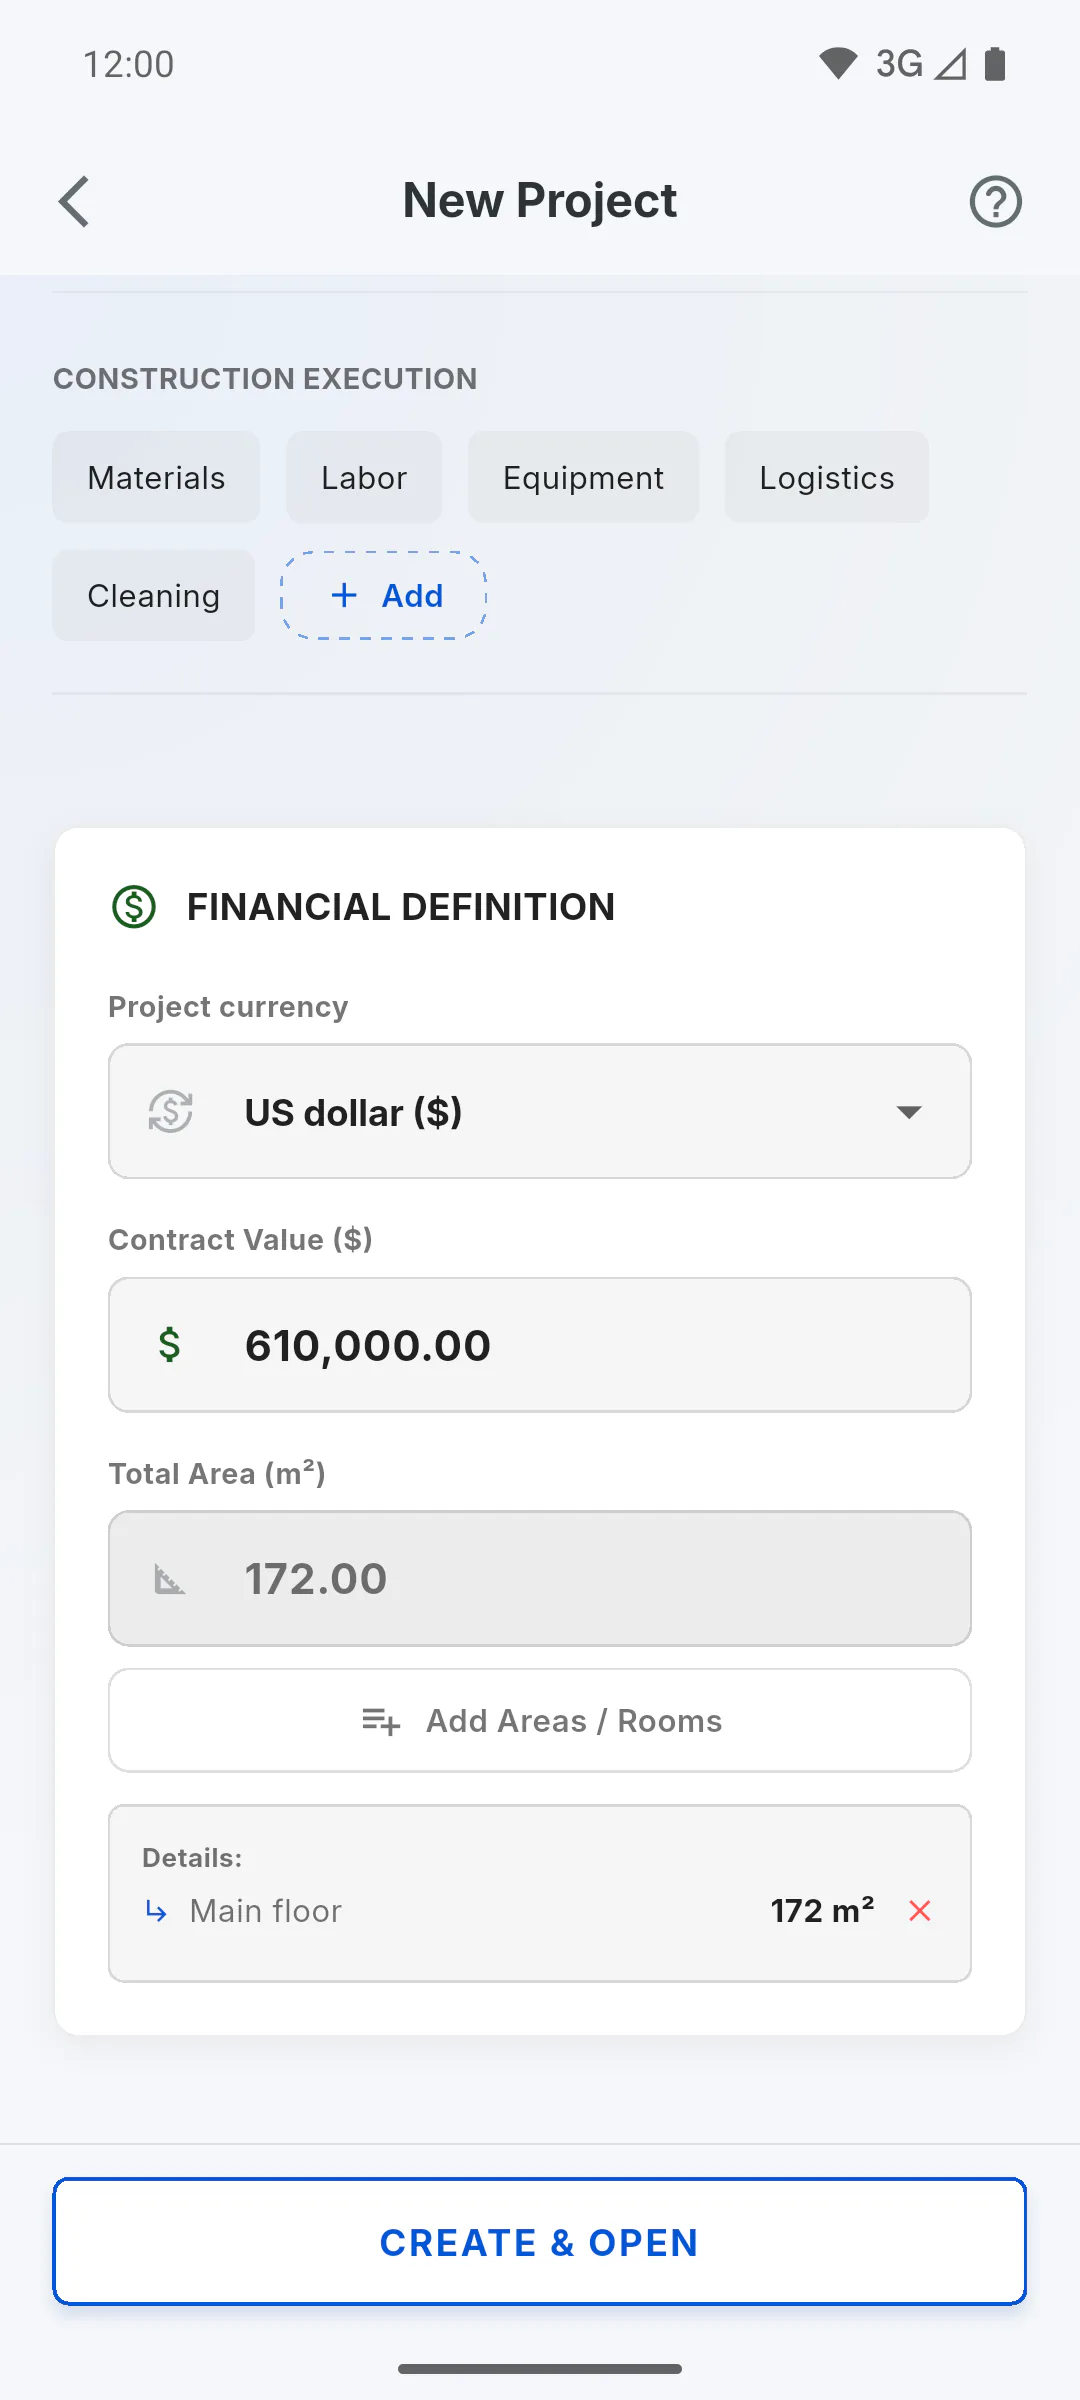
Under Financial Definition, choose the Project currency and type the Contract Value. Total Area (m²) is the sum of the areas you add under Add Areas / Rooms.
- Each schedule stage takes its budget from the contract value: without it, you can't create stages later.
Step 6: Save and open the project
Tap Create & Open. You'll see Project saved successfully! and the Project Hub opens: Getting to know the Project Hub. Without internet, the cover photo isn't uploaded: pick it again in Edit Project once you're back online.
How to create your first project
Set up a project on a single screen: cover photo, client details, dates, scope, currency and contract value. Once you save, the project opens ready to use.
For managers6 steps
Didn't find what you were looking for?
Chat with support on WhatsApp or open a ticket right in the app.