
Step 1: Open the project
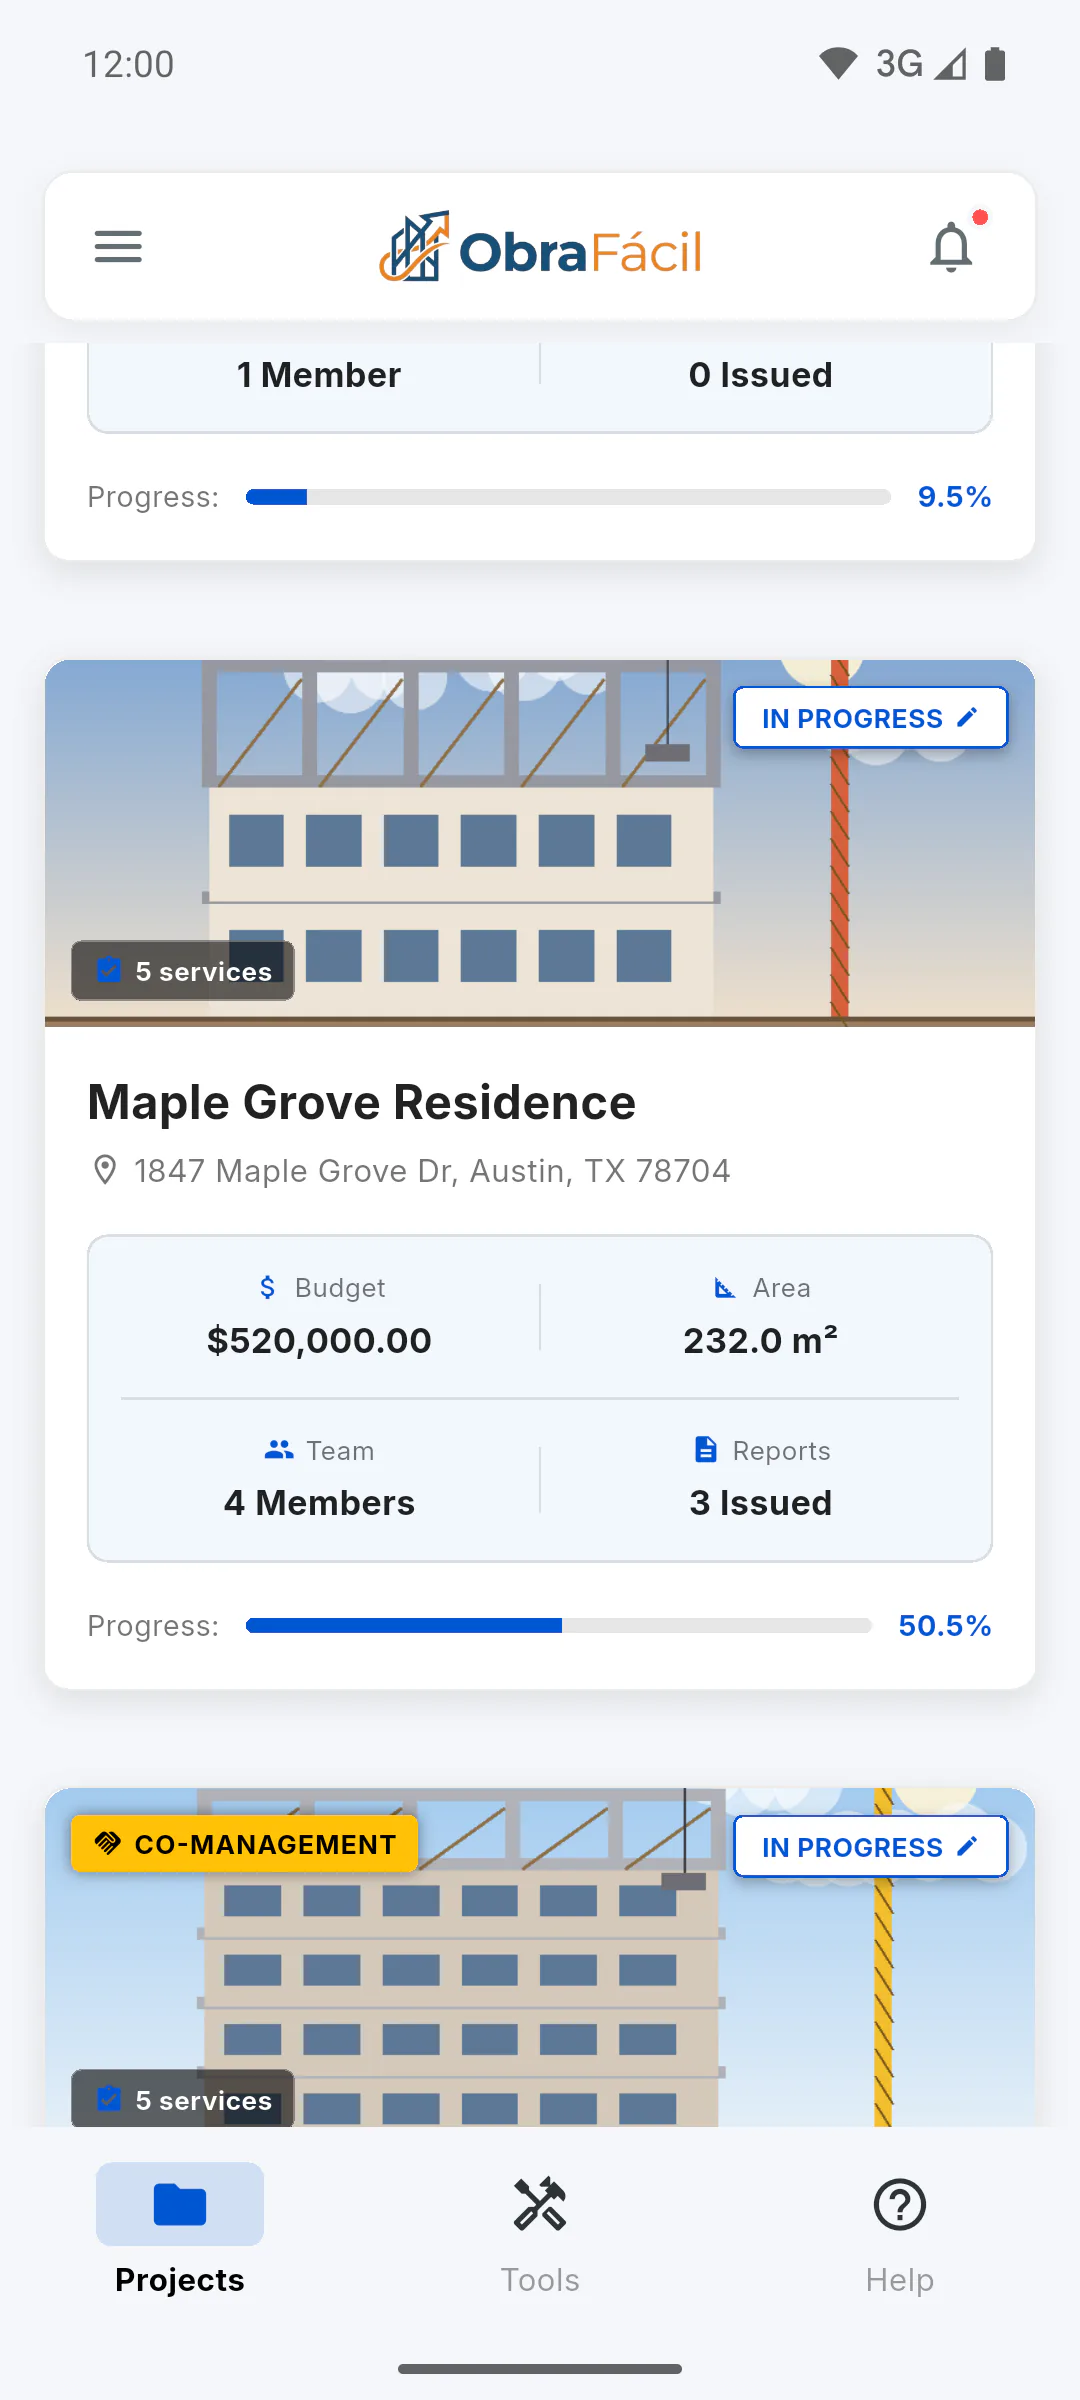
On the dashboard, tap the project card. After you create a new project, the Hub opens on its own. People who manage the project start on Schedule; team members start on Daily Reports.
Step 2: Tabs and project menu
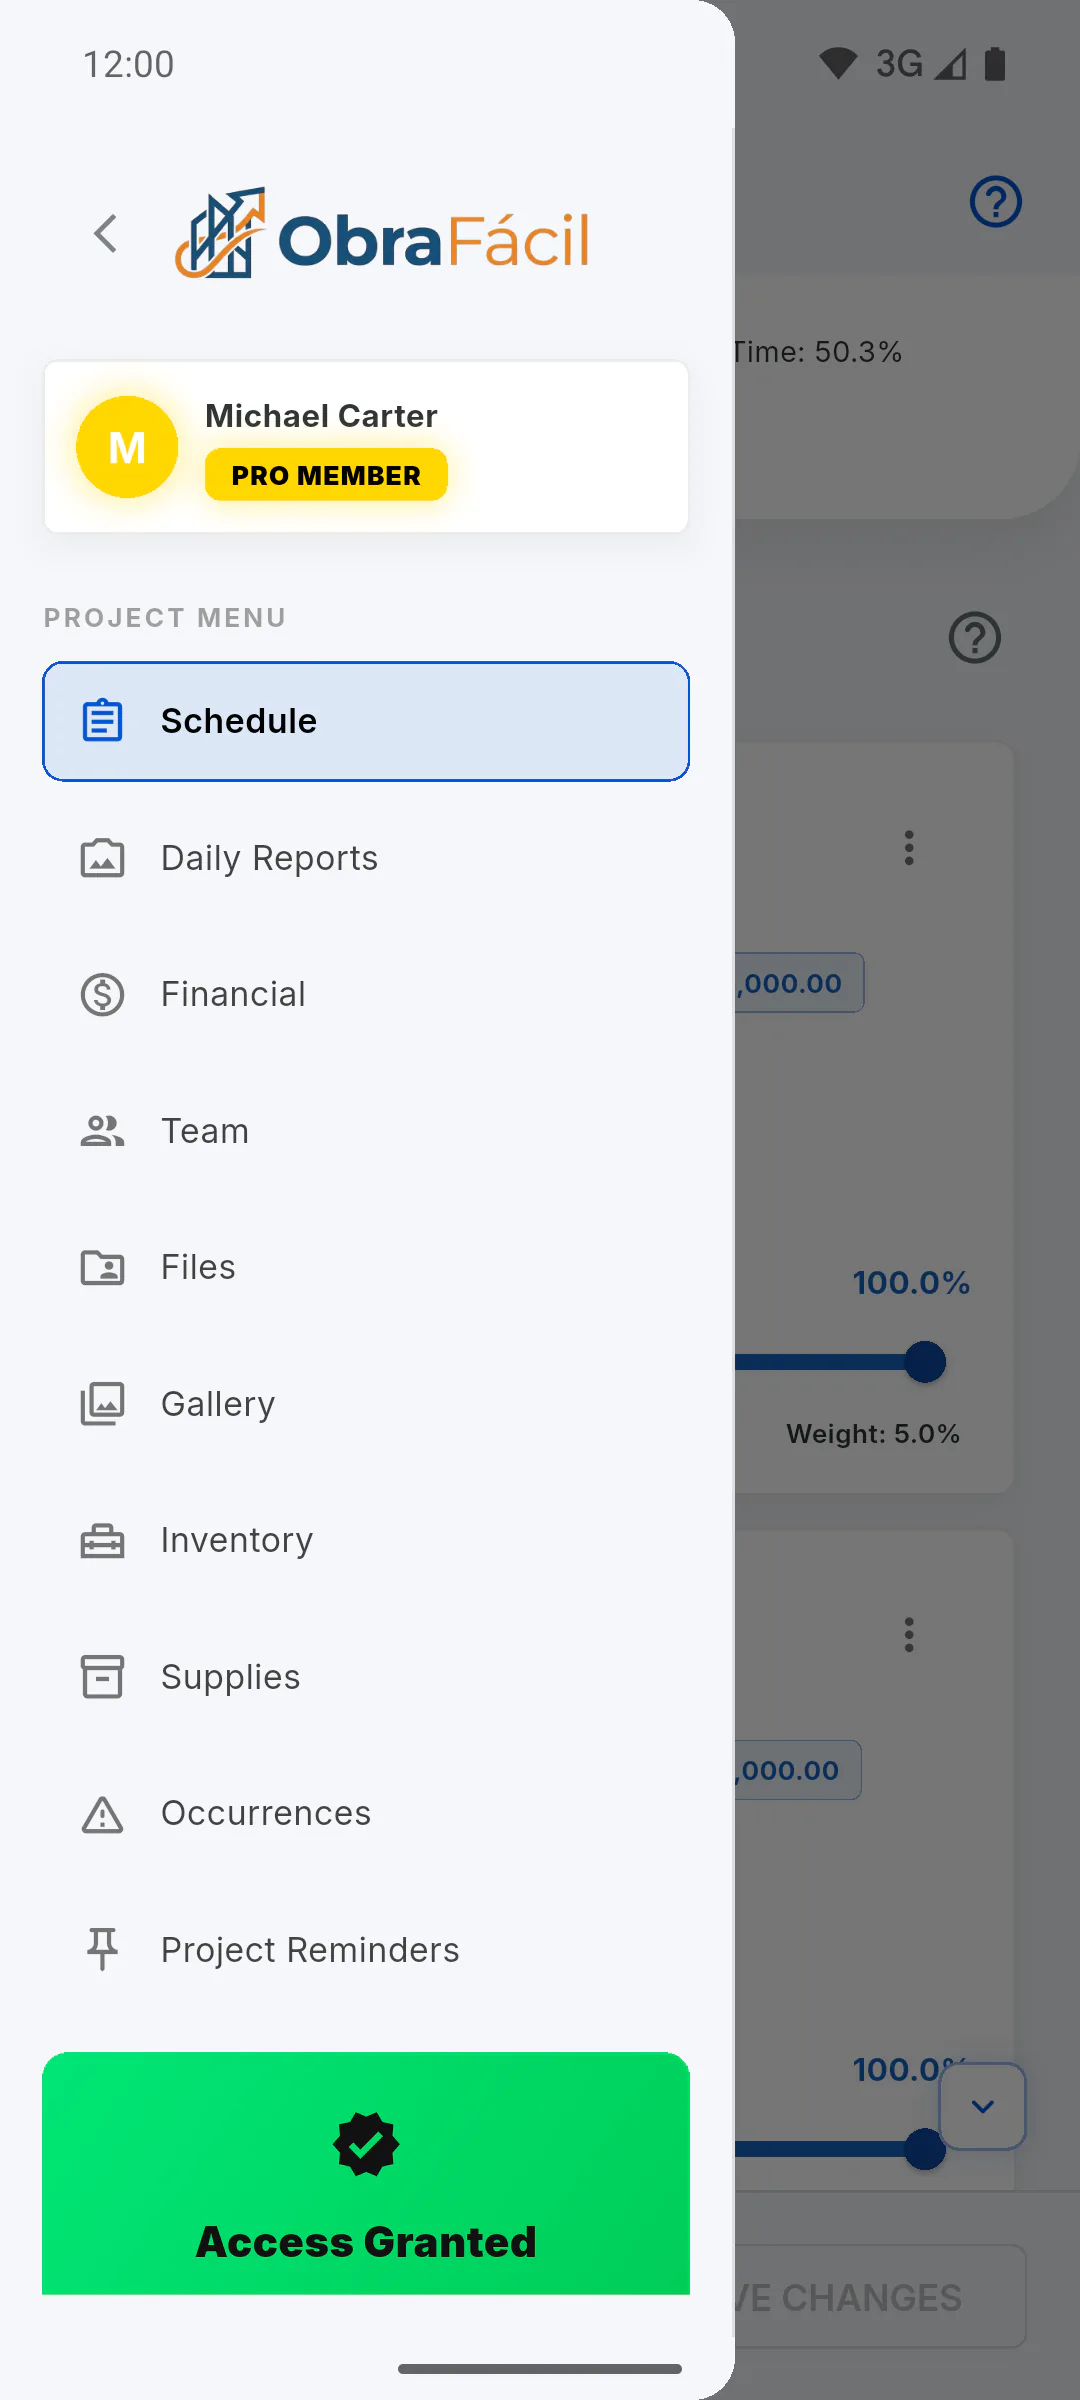
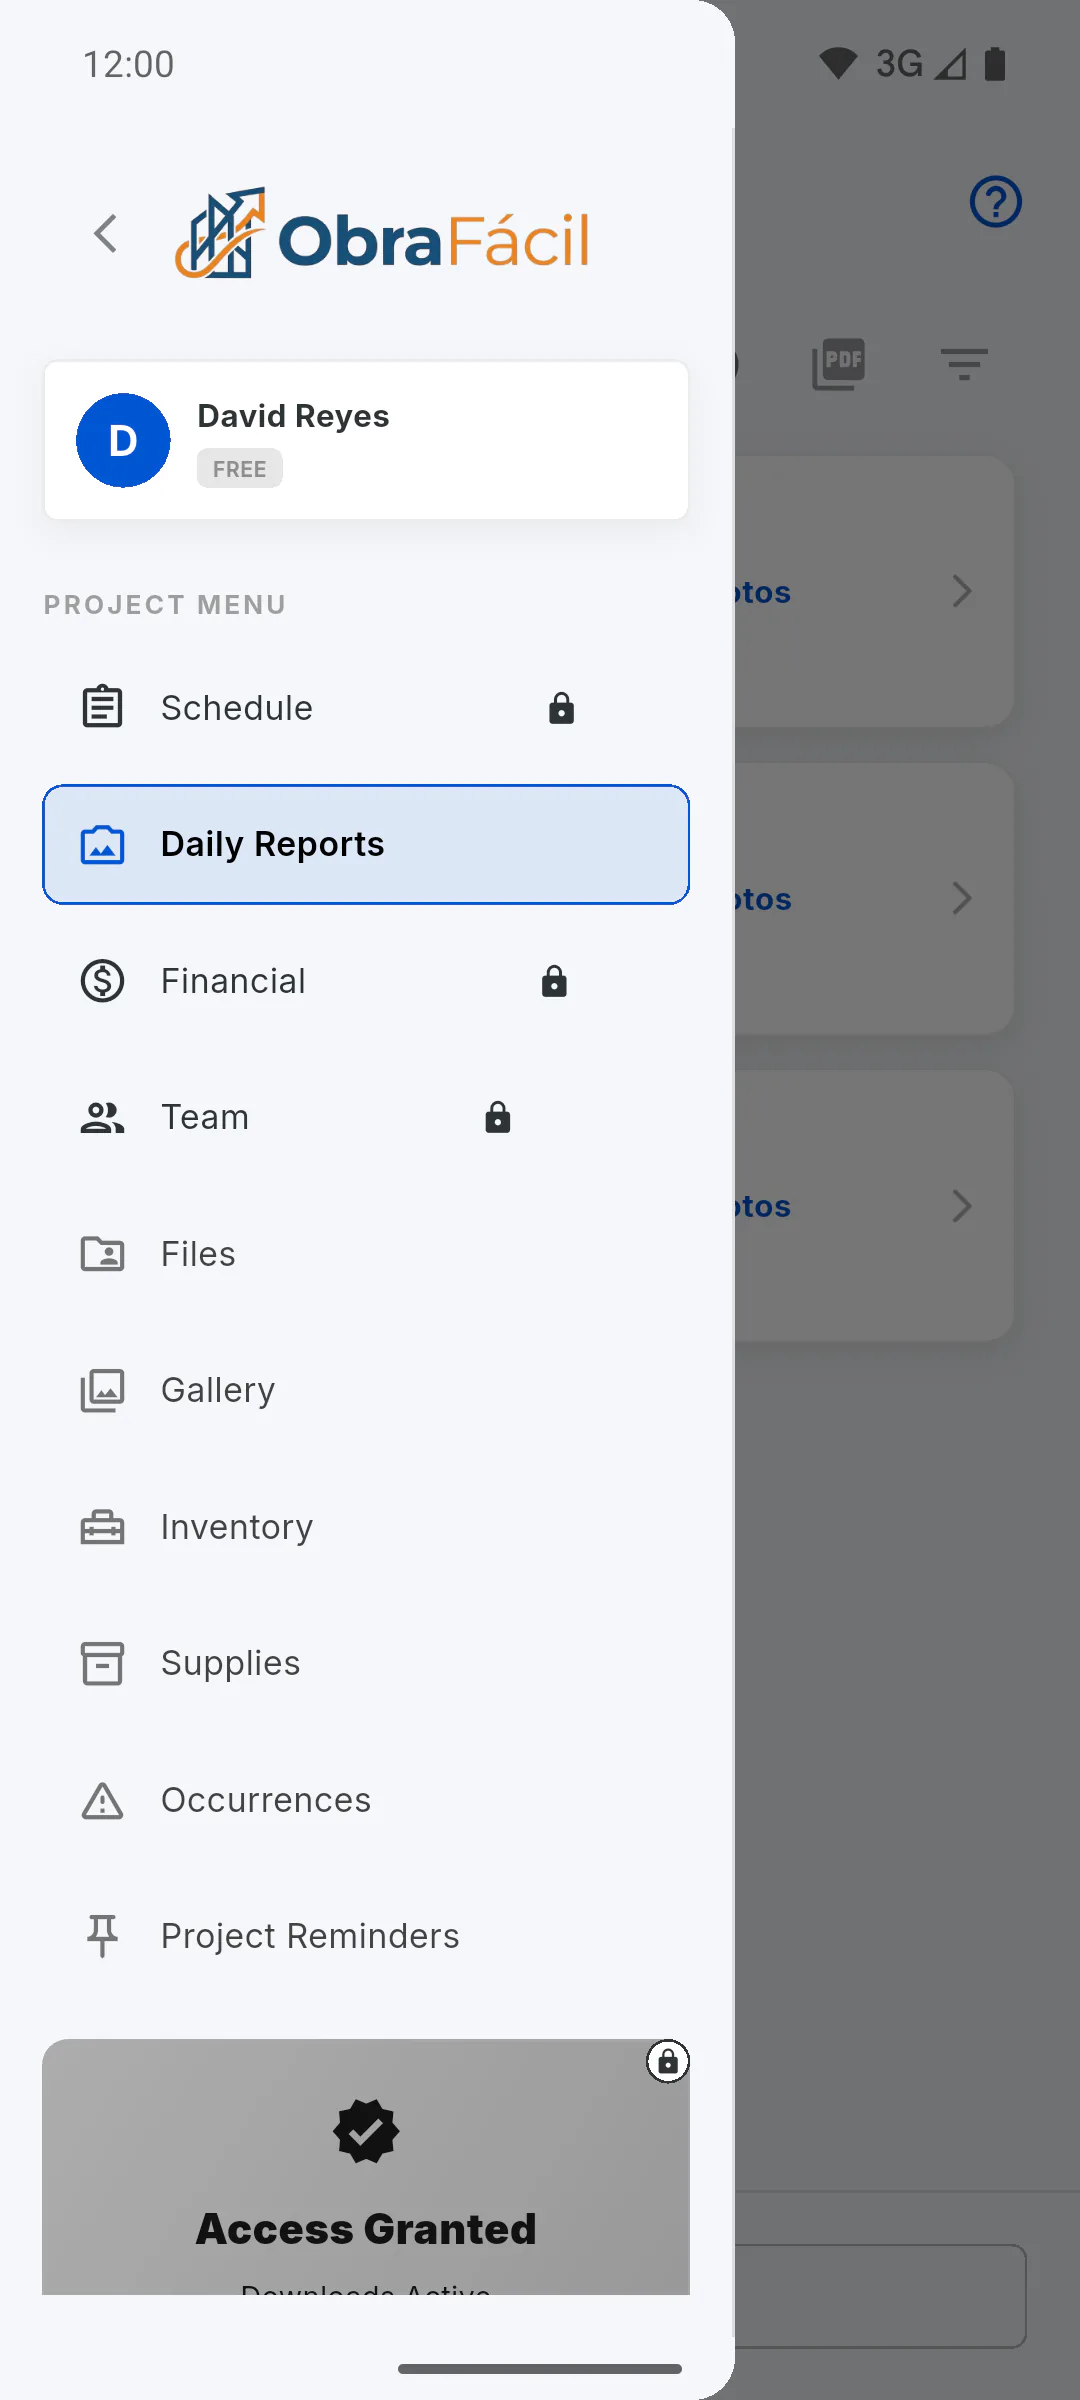
Below the cover are the project tabs: Overview, Schedule, Daily log, Photos, Financial, Team, Files, Occurrences, Inventory, Supplies and Reminders. Those same sections are in the Project Menu (Overview, Schedule, Daily Reports, Gallery, Financial, Team, Files, Occurrences, Inventory, Supplies and Project Reminders), with the Client Access card at the bottom.
- On a phone, the menu is hidden: tap the menu icon in the top-right corner of the cover.
- The arrow at the top of the cover (or My Projects at the top of the menu) takes you back to the dashboard.
Step 3: Project Overview tab
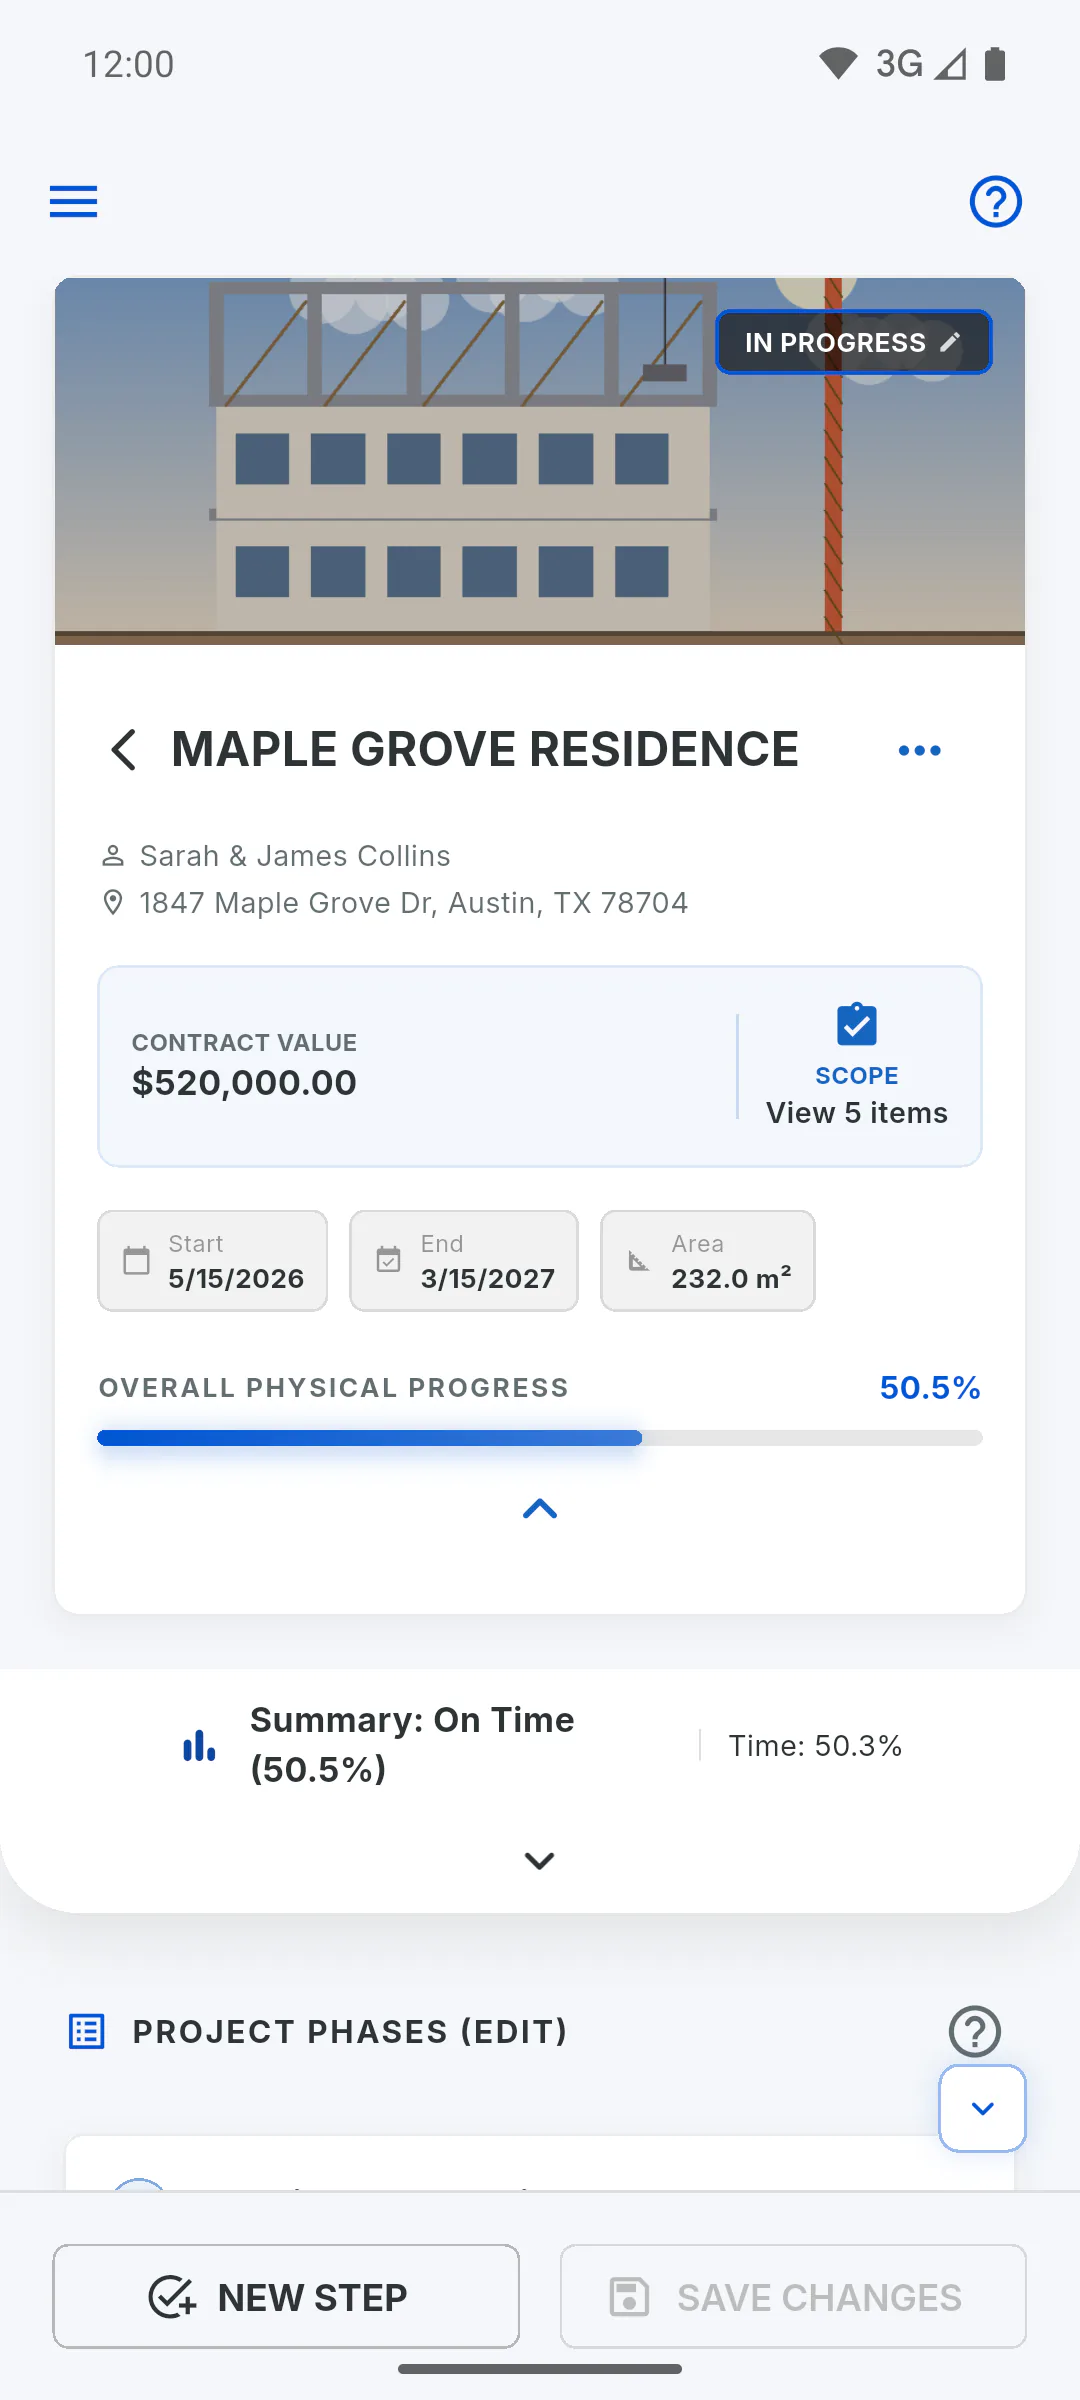
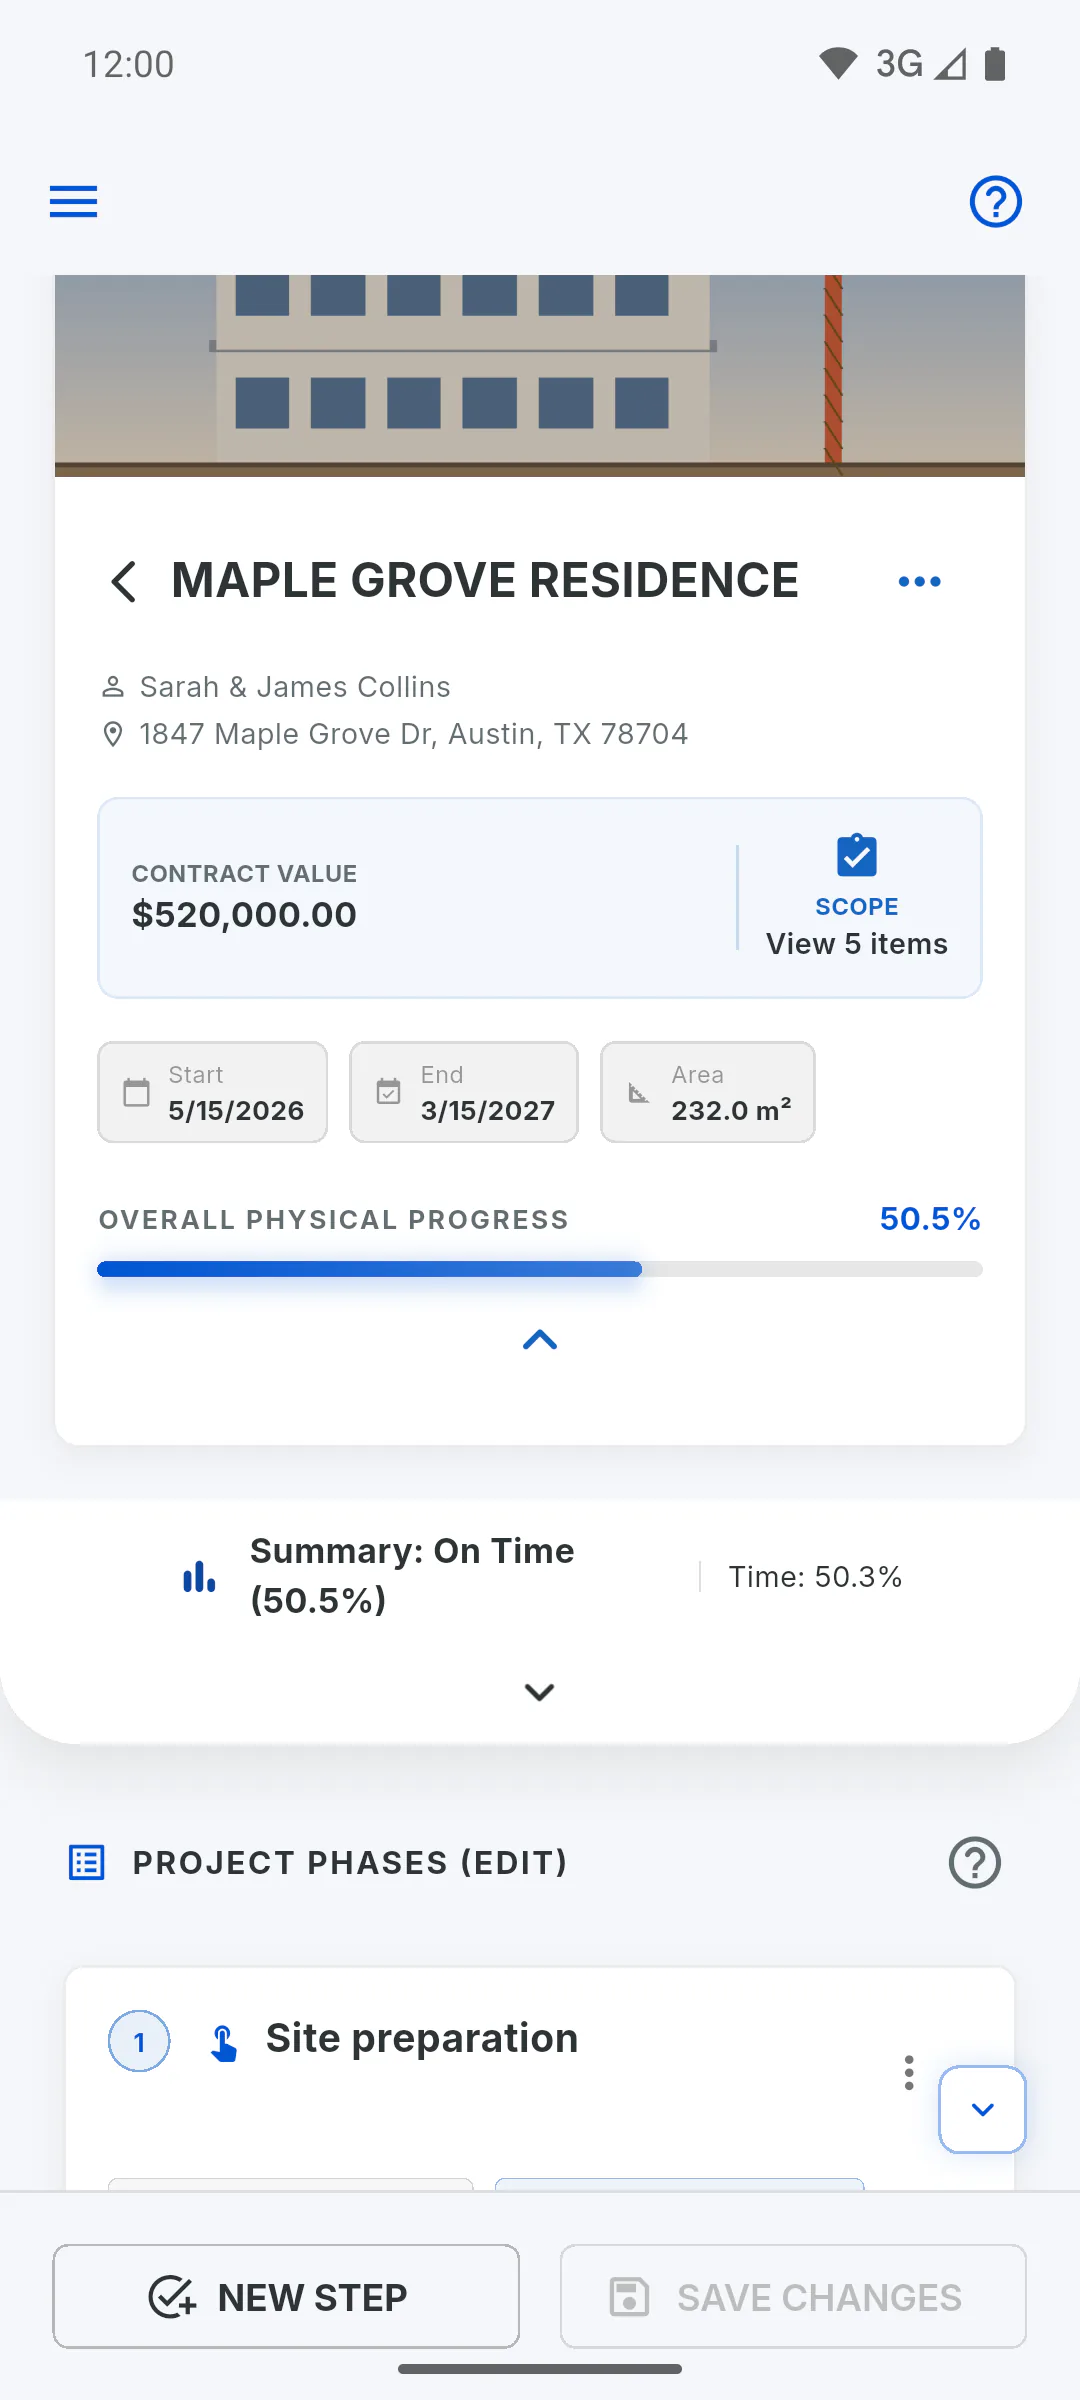
The cover at the top shows the photo, status, project name, client and address (and collapses into a compact pill when you scroll). On the Overview tab you will find:
- At the top, the project status badge (tap it to change the status) and the three-dot menu.
- The Physical progress card, with the completion ring and the schedule badge (ahead of schedule, on schedule or behind schedule).
- The boxes for Contract value (with the available amount when part of the contract is not assigned to stages yet, visible to people who manage the project), Start, Expected completion, Area, Team, Daily logs and Contracted scope with View N items.
Step 4: Three-dot menu
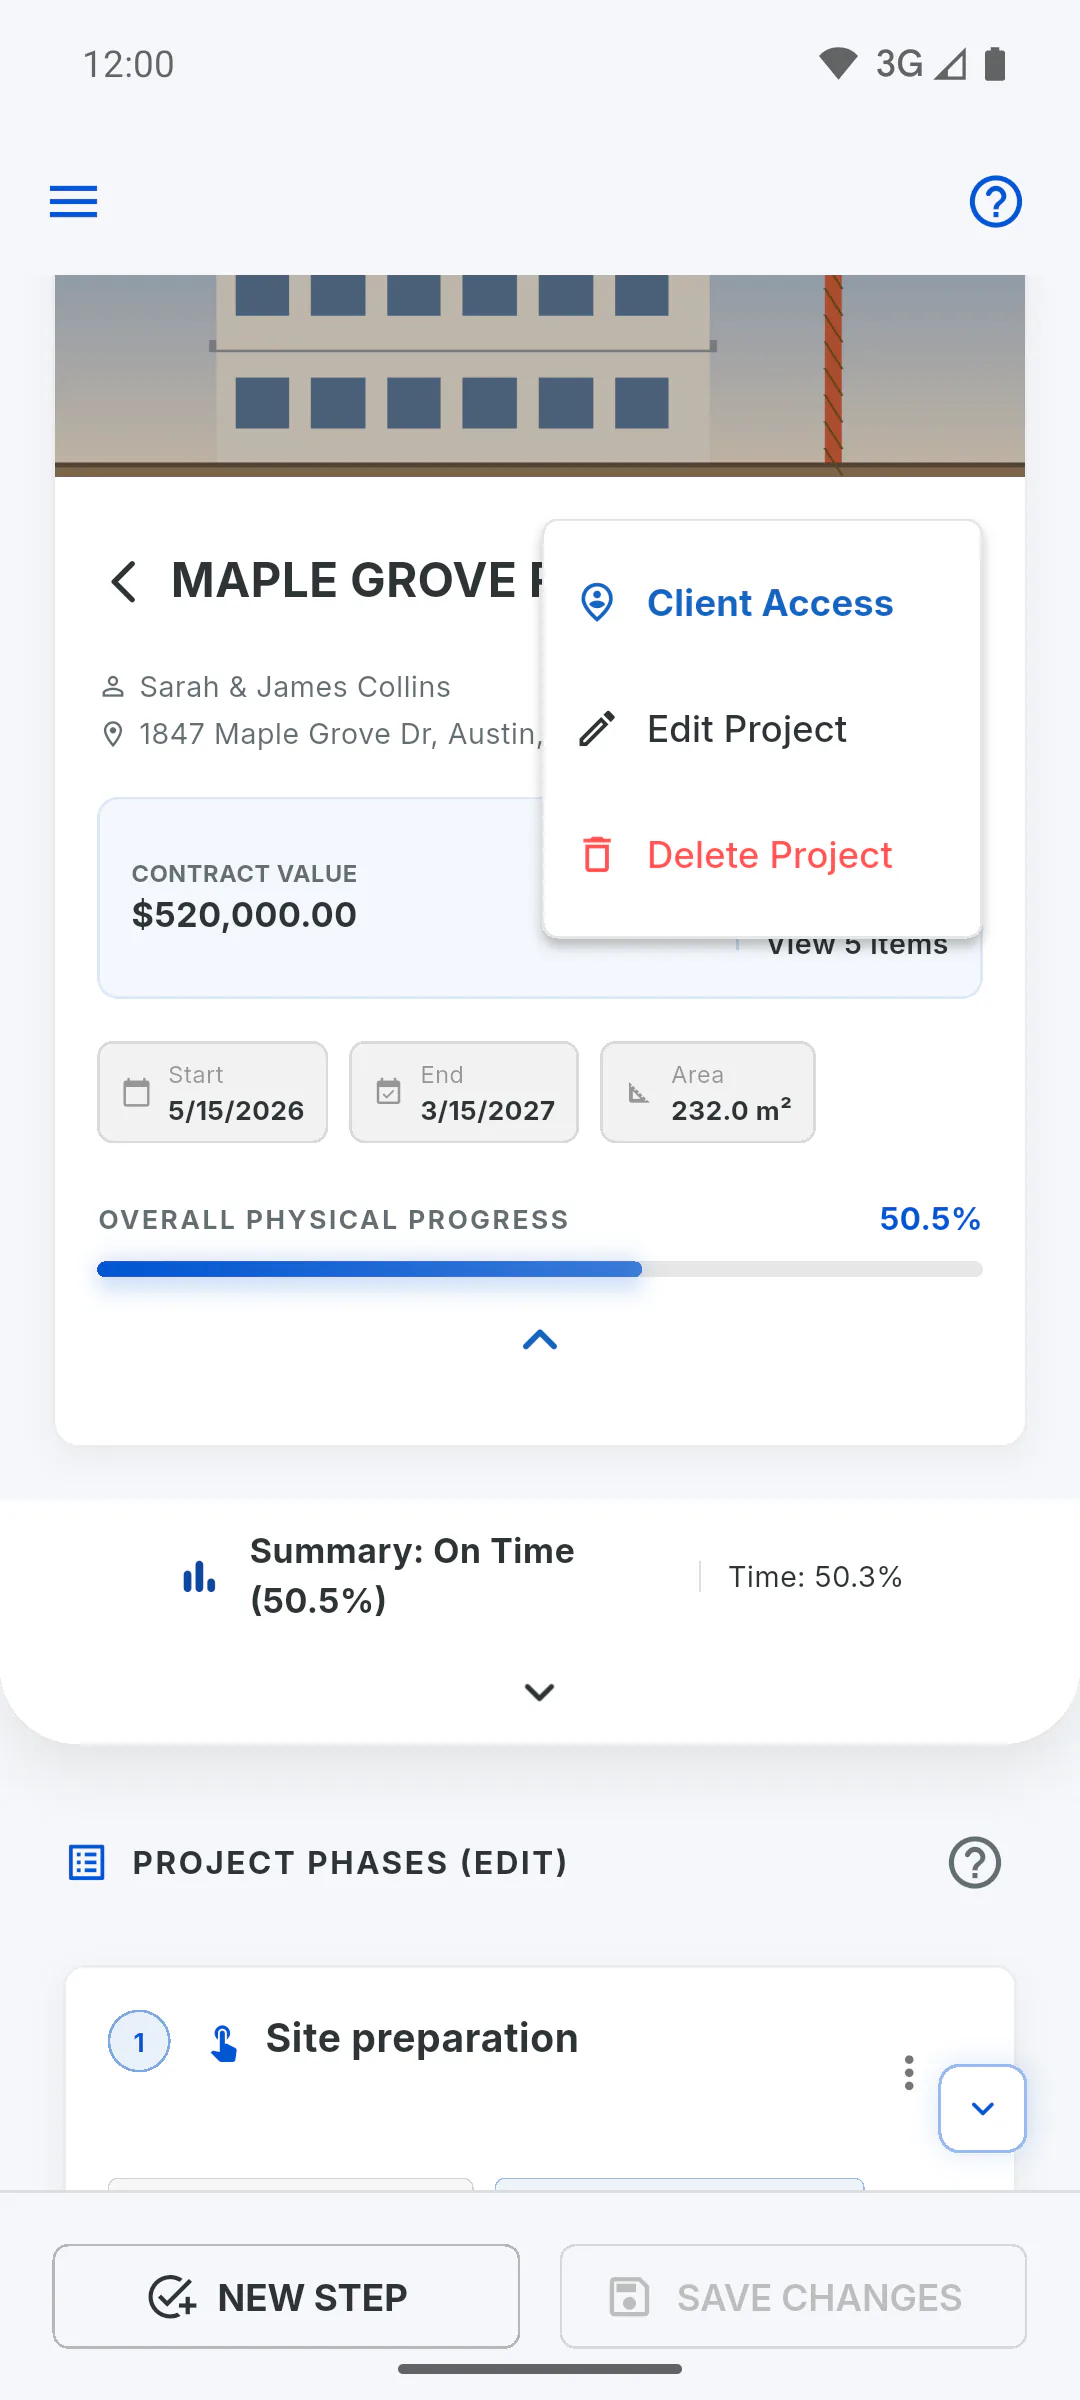
On the Overview tab, next to the status badge, the three-dot menu has Client Access, Edit Project and Delete Project. Setting up client access, editing the details and deleting the project are owner-only actions: How to edit a project's details
- For an invited engineer, Edit Project is replaced by View project details, with no lock icon, which opens the project details view-only; the other two items show a lock icon. For Team members, all three show a lock icon.
Step 5: Bottom buttons
On Schedule, the bottom bar has New Step and Save Changes. On Daily Reports, it has New Report: How to create a daily report
- Schedule changes only count after Save Changes. If you switch areas or leave first, you'll see Unsaved Changes, with Discard or Save.
Step 6: Who sees what
Each person sees the Hub according to their role on the project. Anything the role doesn't allow appears grayed out with a lock icon, such as Schedule, Financial and Team for Team members (and the Contract value box is hidden on the Overview tab): Engineer, Team and Client: what each role sees
- Tapping a locked item opens a window showing your role on the project and who can use it.
Getting to know the Project Hub: menu, summary and actions
The Hub is each project's home screen: the cover at the top, the tab bar, the Overview tab with progress and project boxes, the side menu and the buttons to create stages and daily reports.
For managers and team members6 steps
Didn't find what you were looking for?
Chat with support on WhatsApp or open a ticket right in the app.